Welcome to my comprehensive guide on how to make soap at home using natural ingredients. In this guide, I will provide you with step-by-step instructions, helpful tips, and delicious homemade soap recipes to help you create organic soaps that are gentle on your skin.
Whether you’re a beginner or an experienced soap maker, this guide has everything you need to know to get started on your DIY soap making journey. From selecting the right ingredients to mastering different soap making techniques, you’ll be able to create beautiful and nourishing soaps right in the comfort of your own home.
So, gather your supplies and let’s dive into the wonderful world of natural soap making!
Key Takeaways:
- Learn how to make soap at home using natural ingredients
- Discover step-by-step instructions and homemade soap recipes
- Create personalized and organic soaps that are gentle on the skin
- Explore different soap making techniques and find the one that suits you
- Enjoy the benefits of homemade soap and the satisfaction of creating your own natural skincare products
Why Make Soap at Home?
Making soap at home using natural ingredients offers several advantages. Firstly, homemade soap allows you to have complete control over the ingredients, ensuring that you’re using wholesome, chemical-free materials. Additionally, natural soaps are gentle on the skin and do not contain harsh detergents or additives commonly found in store-bought soaps. By making soap at home, you can customize the scents, colors, and textures, creating unique and personalized bars of soap.
- Pure and Chemical-Free: Homemade soap gives you the peace of mind of knowing exactly what you’re putting on your skin. It allows you to use natural, organic ingredients free from harmful chemicals, synthetic fragrances, and artificial additives.
- Personalization: When you make soap at home, you have the freedom to customize it according to your preferences. You can experiment with different scents, colors, and textures, allowing you to create soap bars that reflect your unique style and personality.
- Cost-Effective: Homemade soap can be more cost-effective in the long run. While there may be some initial investment in soap-making supplies, such as oils, lye, and molds, the overall cost per bar can be significantly lower than store-bought options.
- Creative Outlet: Soap making can be a creative and enjoyable hobby. It allows you to explore various ingredients, techniques, and designs, unleashing your artistic side and providing a therapeutic and fulfilling experience.
- Sustainable Choice: By making soap at home, you can reduce your environmental impact. You have the opportunity to source sustainable ingredients, use minimal packaging, and create less waste compared to commercially produced soaps.
Whether you’re looking to create a natural alternative to commercial soaps, express your creativity, or simply enjoy the satisfaction of making something with your own hands, the benefits of homemade soap and the advantages of natural soap making are clear.

Homemade Soap vs. Store-Bought Soap
| Homemade Soap | Store-Bought Soap | |
|---|---|---|
| Ingredients | Wholesome, chemical-free, customizable | Potential for harsh chemicals, synthetic additives |
| Skin-Friendly | Gentle, moisturizing | Potential for drying or irritating effects |
| Personalization | Customizable scents, colors, and textures | Limited customization options |
| Environmental Impact | Sustainable, minimal packaging | Potential for excess packaging and waste |
| Creative Outlet | Opportunity for artistic expression | Limited creative involvement |
Getting Started with Soap Making
Before you embark on your soap making journey, it’s essential to gather all the necessary supplies and tools. Having everything ready will ensure a smooth and efficient soap-making process. Here are the essential items you’ll need:
Soap Making Supplies
| Supplies | Description |
|---|---|
| Digital Scale | A digital scale is crucial for accurate measurements of soap ingredients. It allows you to measure oils, lye, and other additives precisely, ensuring the right ratios for a successful soap batch. |
| Thermometer | A thermometer is necessary for monitoring temperatures throughout the soap making process. It helps you achieve the ideal temperature range for combining oils and lye, ensuring proper saponification. |
| Heatproof Pitcher | A heatproof pitcher is used for mixing lye and water. Make sure the pitcher can withstand the heat generated during the lye solution preparation. |
| Soap Pot or Large Bowl | A soap pot or large bowl will be your main vessel for blending oils with the lye solution. It should be heat-resistant and spacious enough to accommodate the soap-making process. |
Essential Tools for Soap Making
| Tools | Description |
|---|---|
| Rubber Gloves | Rubber gloves are necessary to protect your hands from lye, which is caustic and can cause skin irritation. Ensure the gloves fit well to allow dexterity while ensuring safety. |
| Safety Goggles | Safety goggles protect your eyes from potential splashes or fumes from lye or other soap-making ingredients. Choose goggles that provide a snug and comfortable fit. |
| Long Sleeves | Wearing long sleeves will provide extra protection for your arms while working with lye. It helps prevent accidental spills or splashes from coming into direct contact with your skin. |
Remember, safety is of utmost importance when making soap. Always wear proper protective gear, follow safety protocols, and handle lye with caution. By taking these necessary precautions and having the essential supplies and tools at hand, you’ll be well-prepared to embark on your soap making adventure.

Choosing the Right Recipe
When it comes to soap making, selecting the right recipe is essential. With a plethora of soap recipes available online, ranging from basic to complex, it’s important to consider your preferences and the ingredients you have on hand.
For accurate measurements, it’s advisable to utilize a lye calculator. This helpful tool ensures the correct ratio of oils to lye, resulting in a well-balanced soap. By using a lye calculator, you can avoid potential issues and produce consistent and safe homemade soap.
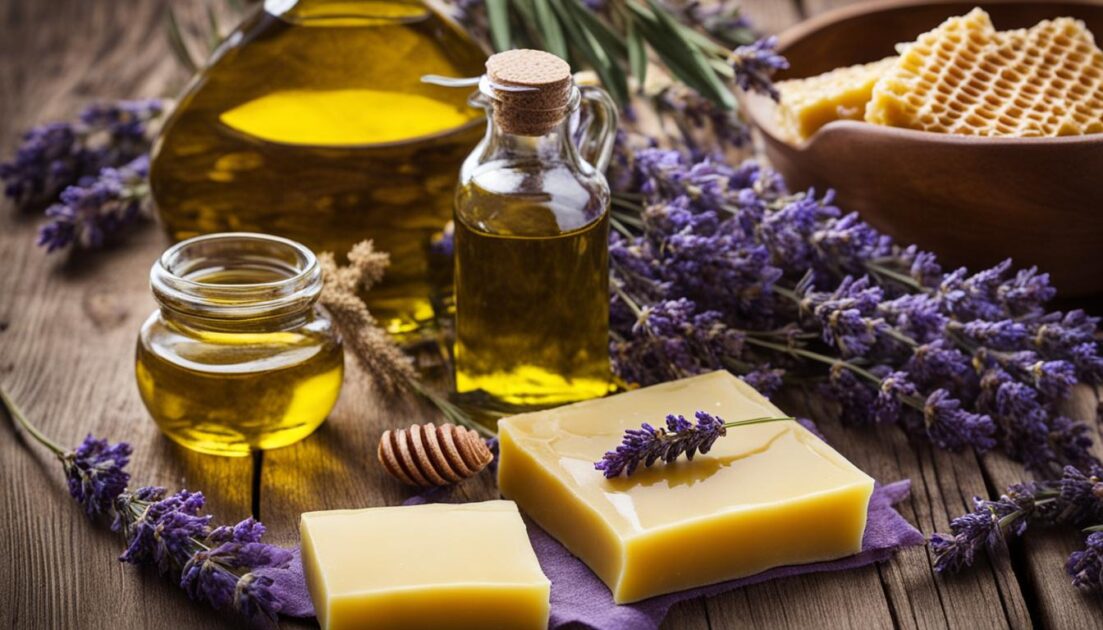
To create a nourishing and aromatic soap, it’s crucial to use high-quality ingredients. Olive oil, known for its moisturizing properties, is a popular choice. Coconut oil adds cleansing and lathering abilities to the soap. Additionally, incorporating essential oils can provide fragrance and potential therapeutic benefits.
As a soap maker, you have the freedom to adjust the recipe to suit your specific preferences. Whether you desire a specific scent, vibrant colors, or a unique texture, the recipe can be tailored to your liking. Get creative and experiment with various ingredients to create a truly one-of-a-kind bar of soap.
Sample Soap Recipe:
| Ingredients | Quantity (in grams) |
|---|---|
| Olive oil | 250 |
| Coconut oil | 200 |
| Shea butter | 100 |
| Lye | 90 |
| Water | 225 |
| Essential oil (lavender) | 15 |
| Colorant (mica powder) | As desired |

Melt and Pour Soap Making
If you’re new to soap making or prefer a simpler method, consider melt and pour soap making. This technique involves melting a pre-made soap base and adding scents, colors, and other additives. Melt and pour soap is ideal for beginners as it doesn’t require handling lye. The process is quick and easy, and the resulting soap can be used immediately. It’s a great option for creating unique soap bars without the need for advanced techniques.
Why Choose Melt and Pour Soap Making?
Melt and pour soap making is a convenient and beginner-friendly method that allows you to create beautiful soaps without the complexity of working with lye. It’s a fantastic way to explore your creativity and make personalized soap bars for yourself, friends, and family.
Here are a few advantages of melt and pour soap making:
- Easy and Safe: With pre-made soap bases, you can skip the process of handling lye, making it a safer option for beginners. It simplifies the soap making process, allowing you to focus on experimenting with scents, colors, and designs.
- Quick Results: Melt and pour soap can be used immediately after it solidifies, which means you can enjoy your handmade soap without having to wait for the curing process.
- Versatile Formulation: The pre-made soap bases come in various formulations, such as clear glycerin, shea butter, or goat’s milk, giving you options to customize your soap’s properties and benefits.
- Creative Freedom: You can add your favorite essential oils, botanical extracts, exfoliants, and even cosmetic-grade colorants to achieve different scents, textures, and visual effects in your soap creations.
Whether you’re crafting soaps for personal use, gifting, or even starting a small soap business, melt and pour soap making offers a delightful and accessible way to create beautiful handmade soap without the need for advanced techniques.
Cold Process Soap Making
Cold process soap making is a time-honored method used in traditional soap making. It involves a chemical reaction called saponification, which occurs when oils and lye combine. This process creates a luxurious and moisturizing soap that is gentle on the skin.
To create cold process soap, it’s essential to carefully measure and combine oils and a lye solution. Maintaining the correct temperatures and proportions is crucial for a successful batch of soap. Once the mixture reaches a stage known as “trace,” it thickens and is ready for customization.

During the trace stage, you can add scents, colors, and other additives to personalize your soap. Whether you prefer the soothing aroma of lavender or the invigorating scent of citrus, the possibilities are endless for creating unique soap bars.
After customizing the soap, it’s time to pour the mixture into molds. The soap will further solidify as it cures over a period of 4-6 weeks. This curing process is necessary to achieve optimal hardness and quality. Patience is key when making cold process soap, as the waiting period allows the soap to develop its full potential.
Cold process soap making offers a satisfying and rewarding experience. By following the traditional method of saponification, you can craft exquisite soaps that nourish and pamper your skin. Dive into the world of cold process soap making and unleash your creativity with endless possibilities for scents, colors, and designs.
Hot Process Soap Making
Hot process soap making is a variation of cold process soap making that involves cooking the soap batter to accelerate the saponification process. This method offers a few advantages over cold process soap making, including faster soap curing and a rustic appearance.
During hot process soap making, the soap batter is cooked in a slow cooker or pot for about an hour. It’s important to periodically stir the mixture to ensure even cooking. As the soap cooks, it goes through various stages and eventually reaches a mashed-potato-like consistency.
At this point, you can add scents, such as essential oils, to enhance the soap’s fragrance. Once the desired scent is added, pour the soap into molds and let it cool and harden.
Note: Hot process soap can be used immediately after it has cooled, but additional curing time is recommended to allow the soap to fully harden and improve its longevity.
Hot process soap making is a great option if you’re looking for a quicker soap curing time or want to create a soap with a unique, rustic appearance. The cooking process helps accelerate the saponification reaction, resulting in a soap that is ready to use in a shorter period of time compared to cold process soap.

Safety Precautions and Tips
Soap making involves working with caustic substances such as lye, which requires careful handling to ensure your safety. By following these soap making safety guidelines and precautions, you can protect yourself and create your soap with confidence.
- Protective Gear: Always wear the appropriate protective gear when handling lye, including gloves and goggles. Long sleeves and pants are also recommended to minimize skin exposure.
- Well-Ventilated Area: Work in a well-ventilated area to avoid breathing in any fumes. Open windows and use fans to ensure proper air circulation.
- Lye Handling: Remember to add lye to water, and never the other way around. This order will help prevent dangerous reactions and potential splashes.
- Child and Pet Safety: Keep lye solutions and soap-making supplies out of the reach of children and pets. Store them in a secure location and label them clearly for safety.
Remember, safety should always be your top priority when working with caustic substances. Take the necessary precautions to protect yourself and others during the soap making process.
Tips for Working with Lye
Handling lye can be intimidating for beginners, but with the right precautions, you can work with lye safely and confidently. Follow these tips to ensure a successful soap-making experience:
- Accurate Measurement: Use a digital scale to measure lye and other ingredients accurately. Precise measurements are crucial for the soap-making process.
- Recipe and Instruction Adherence: Follow soap recipes and instructions precisely to achieve the desired results. Deviating from the recommended measurements or steps can lead to unsuccessful batches.
- Temperature Control: Monitor the temperatures of both the lye solution and the oils during the soap-making process. Maintaining the correct temperatures is essential for proper soap formation.
- Clean-Up: After working with lye, clean the equipment and surfaces thoroughly to ensure no residue is left behind. Use neutralizing agents if necessary.
By implementing these soap making safety precautions and working with lye responsibly, you can enjoy the process of creating your own homemade soap without compromising your well-being.

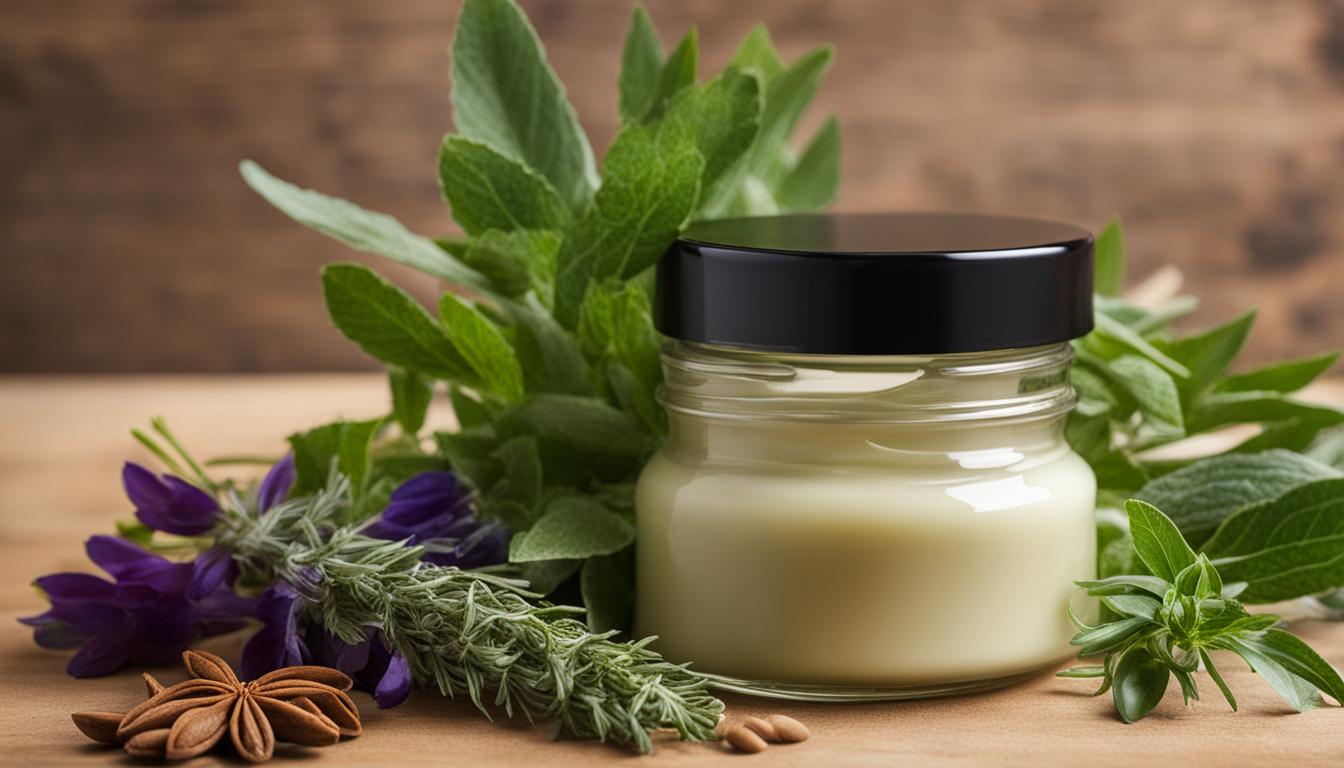
Customizing Your Soap
Customizing your soap allows you to create unique and personalized bars. You have the freedom to experiment with various natural additives, such as herbs, spices, exfoliants, and essential oils, to enhance your soap with fragrance, texture, and beneficial properties. By exploring different scent combinations and coloring options, including natural colorants like clays and botanical extracts, you can create visually appealing and aesthetically pleasing soap bars.
Additional customization options include getting creative with swirls, layers, and designs, making your soap not only functional but also visually stunning. The possibilities for customization are endless when it comes to homemade soap. You can let your imagination run wild and create soap that truly reflects your unique style and preferences.
“Customizing your soap allows you to unleash your creativity and bring your vision to life. By incorporating natural additives and experimenting with different scents and colors, you can create soaps that are not only luxurious but also tailored to meet your individual needs and preferences.”
The Benefits of Natural Soap Additives
Natural soap additives offer a myriad of benefits that enhance the overall quality and experience of using homemade soap. Some popular options include:
- Herbs and botanicals: Adding dried herbs or botanicals to your soap can provide gentle exfoliation or soothing properties. For example, lavender buds can create a calming effect, while calendula petals can offer a soothing experience.
- Essential oils: These concentrated plant extracts not only add delightful scents to your soap but also offer various therapeutic benefits. Choose essential oils based on their aromatherapeutic properties, such as lavender for relaxation or peppermint for an invigorating sensation.
- Exfoliants: Scrub away dead skin cells and reveal a smoother complexion by incorporating exfoliants like ground coffee, oatmeal, or pumice powder into your soap. These natural exfoliants promote healthy-looking skin.
By customizing your soap with natural additives, you can elevate your soap’s performance while enjoying the benefits of nature’s offerings.
Color Options for Homemade Soap
Exploring different color options allows you to create visually appealing soap that reflects your personal style and preferences. Instead of relying on artificial dyes, consider utilizing natural colorants that are gentle on the skin and offer unique hues:
- Clays: Natural clays, such as French green clay or pink kaolin clay, not only add color to your soap but also provide additional benefits like detoxification or oil absorption.
- Botanical extracts: Infuse your soap with the captivating colors of nature by incorporating botanical extracts like turmeric for a vibrant yellow or spirulina for a rich green shade.
- Natural pigments: From cocoa powder for a warm brown to beetroot powder for a soft pink, natural pigments derived from food sources can create a range of attractive color options for your soap.
Experimenting with different colors and color combinations allows you to create unique and visually appealing soap that stands out.

With the ability to customize your soap using natural additives and explore various scent and color options, soap making becomes an art form that allows you to express your creativity and individuality. Whether you prefer vibrant and visually striking soap or a more subtle and soothing bar, homemade soap customization offers endless possibilities for crafting unique and personalized products.
Curing and Storing Your Soap
After making soap, it’s crucial to allow it to cure for a period of 4-6 weeks. Curing plays a vital role in improving the hardness, effectiveness, and mildness of the soap. During this time, excess water evaporates, resulting in a harder and longer-lasting bar.
Properly cured soap should be stored in a cool, dry place to maintain its quality. It’s essential to protect the soap from humidity and temperature fluctuations, as they can affect its texture and performance. To ensure the longevity of your homemade soap, consider using a soap dish or rack that allows for proper draining and airflow.
By storing your soap correctly, you can preserve its beneficial properties and extend its shelf life. A properly cured and well-stored soap will continue to provide a luxurious and nourishing experience with every use.
Enjoying Your Homemade Soap
Now that your homemade soap has completed the curing process, it’s time to reap the benefits of your creation. Using homemade soap offers a range of advantages over commercially-produced options. With its natural ingredients and absence of harsh chemicals and artificial additives, handmade soap is gentle on the skin and provides a luxurious and moisturizing cleansing experience.
Take pleasure in sharing the fruits of your labor with family and friends or use your homemade soap as thoughtful gifts. The satisfaction of creating your own soap cannot be overstated. The nourishing properties of the natural ingredients will leave you feeling pampered and refreshed each time you use it.
Embrace the versatility of homemade soap by indulging in different scents, colors, and textures. Each bar is a unique reflection of your personal preferences and creativity. It’s a delightful experience to customize your soap with natural additives, such as herbs, spices, or exfoliants. Explore the aromatherapy benefits of various essential oils and experiment with swirling colors to make your soap visually appealing.
By using homemade soap, you are making a conscious choice to prioritize your well-being. The benefits of natural soap extend beyond its cleansing properties. Unlike commercial soaps that often strip the skin of its natural oils, handmade soap retains its moisturizing qualities. It helps to soothe and nourish the skin, leaving it feeling soft, supple, and thoroughly rejuvenated. Embrace the satisfaction of using a high-quality, sustainable product that cares for your skin and the environment.
FAQ
What are the benefits of making soap at home?
Making soap at home allows you to have control over the ingredients, ensuring chemical-free materials. Natural homemade soaps are gentle on the skin and do not contain harsh detergents or additives found in store-bought soaps. You can also customize scents, colors, and textures to create unique and personalized bars of soap.
What tools and supplies do I need for soap making?
To make soap at home, you will need a digital scale for accurate measurements, a thermometer to monitor temperatures, a heatproof pitcher for mixing lye and water, and a soap pot or large bowl for blending oils and lye solution. It’s important to wear rubber gloves, safety goggles, and long sleeves for protection.
How do I choose the right soap recipe?
When choosing a soap recipe, consider your preferences and the ingredients you have on hand. Use a lye calculator to ensure the correct ratio of oils to lye. It’s essential to use high-quality ingredients, such as olive oil, coconut oil, and essential oils, to create nourishing and aromatic soap.
What is melt and pour soap making?
Melt and pour soap making involves melting a pre-made soap base and adding scents, colors, and other additives. It’s a beginner-friendly method that doesn’t require handling lye. The process is quick and easy, and the resulting soap can be used immediately.
What is cold process soap making?
Cold process soap making is a traditional method that involves saponification, the chemical reaction between oils and lye. This process creates a luxurious and moisturizing soap. Once the soap reaches “trace,” scents, colors, and additives can be added before pouring into molds. Cold process soap requires curing for 4-6 weeks for optimal hardness and quality.
What is hot process soap making?
Hot process soap making is a variation of cold process soap making that involves cooking the soap batter to accelerate the saponification process. This method results in a quicker curing time and a rustic appearance. Once the soap reaches a mashed-potato-like consistency, scents can be added before pouring into molds. Hot process soap can be used immediately but benefits from additional curing time.
What safety precautions should I follow when making soap?
Soap making involves handling lye, a caustic substance, so it’s important to follow safety precautions. Wear protective gear like gloves and goggles and work in a well-ventilated area. Always add lye to water, never the other way around, and keep lye solutions away from children and pets. Accurately measure ingredients by weight and follow recipes and instructions precisely.
How can I customize my soap?
You can customize your soap by adding various natural additives such as herbs, spices, exfoliants, and essential oils to add fragrance, texture, and beneficial properties. Experiment with different scent combinations, coloring options, and designs to create unique and personalized bars of soap.
How long does soap need to cure, and how should it be stored?
Soap needs to cure for 4-6 weeks to improve hardness, effectiveness, and mildness. During this time, excess water evaporates, resulting in a harder and longer-lasting bar. Properly cured soap should be stored in a cool, dry place to maintain quality. Use a soap dish or rack that allows for proper draining and airflow to ensure the longevity of your homemade soap.
What are the benefits of using homemade soap?
Homemade soap is gentle on the skin, free from harsh chemicals, and artificial additives. It provides a luxurious and moisturizing cleansing experience. Using natural ingredients in your soap can offer additional nourishing and therapeutic properties. You can also share your homemade soap with others as thoughtful gifts.