Hi there! Welcome to my easy DIY guide on how to make your own natural homemade lipstick. If you’re tired of using conventional lipsticks that are filled with harmful chemicals, then this guide is perfect for you. I’m going to show you a step-by-step process to create your own all-natural and chemical-free lipstick using simple ingredients that you probably already have in your kitchen.
Are you ready to dive into the world of DIY beauty? Let’s get started!
Key Takeaways:
- Learn how to make homemade lipstick with natural ingredients
- Follow an easy step-by-step tutorial
- Create your own chemical-free lipstick
- Customize the color and formulation
- Discover the benefits of homemade cosmetics
Why Choose Homemade Lipstick?
Homemade lipstick offers several benefits compared to conventional lipstick. Conventional lipsticks often contain harmful chemicals that can be absorbed by the skin. By making your own lipstick at home, you can ensure that it is chemical-free and safe to use. Additionally, homemade lipstick allows you to customize the color and choose natural ingredients that nourish and hydrate your lips.
“Conventional lipsticks often contain harmful chemicals that can be absorbed by the skin.”
Unlike store-bought options, homemade lipstick gives you full control over the ingredients you use. You can eliminate the presence of harmful substances such as lead, parabens, phthalates, and artificial fragrances commonly found in conventional lipsticks. This eliminates the risk of exposure to these potentially dangerous chemicals and promotes better lip health.
Furthermore, homemade lipstick allows you to customize the color according to your preferences. By experimenting with natural colorants such as beetroot powder, turmeric, or cocoa powder, you can create a wide range of shades that suit your skin tone and personal style.
Using homemade lipstick also contributes to sustainable living. By making your own cosmetics, you reduce your reliance on single-use plastic packaging and support a zero-waste lifestyle.
By opting for homemade lipstick, you not only protect your lips from harmful chemicals but also promote a more natural and eco-friendly approach to beauty.
Benefits of Homemade Lipstick:
- Chemical-free and safe to use
- Customizable colors
- Nourishes and hydrates lips
- Promotes sustainable living
With homemade lipstick, you can prioritize your health, beauty, and the environment.

| Benefits of Homemade Lipstick | Dangers of Conventional Lipstick | Chemical-free Lipstick | Homemade Cosmetics |
|---|---|---|---|
| Eliminates exposure to harmful chemicals | Contains chemicals that can be absorbed by the skin | Uses natural ingredients | Promotes a healthier beauty routine |
| Customizable colors to suit individual preferences | May contain lead, parabens, and artificial fragrances | Free from artificial additives | Allows for personalization and experimentation |
| Nourishes and hydrates lips | Potential risk to lip health | Moisturizing and beneficial ingredients | Supports better lip care |
| Promotes sustainable living | Contributes to single-use plastic waste | Reduces environmental impact | Fosters eco-conscious beauty choices |
Ingredients for Homemade Lipstick
When it comes to creating your own homemade lipstick, having the right ingredients is key. These essential ingredients will not only provide the necessary texture and hold to your lipstick but also offer nourishing benefits for your lips. Let’s take a closer look at each ingredient:
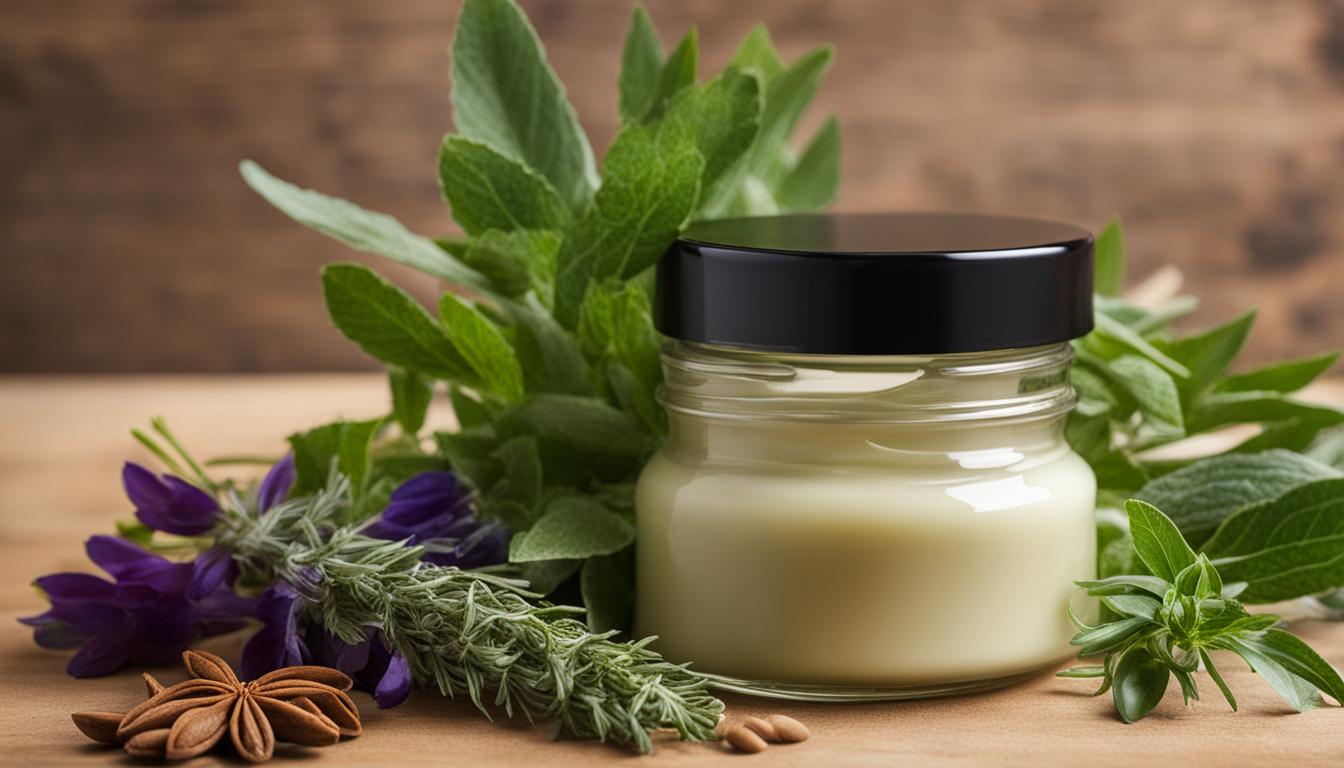
1. Beeswax
Beeswax is a natural ingredient that adds texture and structure to your homemade lipstick. It helps the lipstick hold its shape and gives it a smooth application. Additionally, beeswax forms a protective barrier on the lips, sealing in moisture and preventing dryness.
2. Shea Butter
Shea butter is known for its moisturizing properties, making it an excellent ingredient for homemade lipstick. It keeps your lips hydrated and soft, preventing chapping and promoting overall lip health. Shea butter also adds a creamy consistency to the lipstick, making it easy to apply.
3. Coconut Oil
Coconut oil is a versatile ingredient that supports lip hydration and protects the delicate skin of your lips. It helps to lock in moisture, preventing dryness and leaving your lips feeling soft and supple. Coconut oil also adds a subtle shine to your homemade lipstick.
4. Vitamin E Oil
Vitamin E oil is known for its healing and soothing properties. It helps to nourish and repair chapped lips, keeping them smooth and healthy. Vitamin E oil also prolongs the shelf life of your homemade lipstick, acting as a natural preservative.
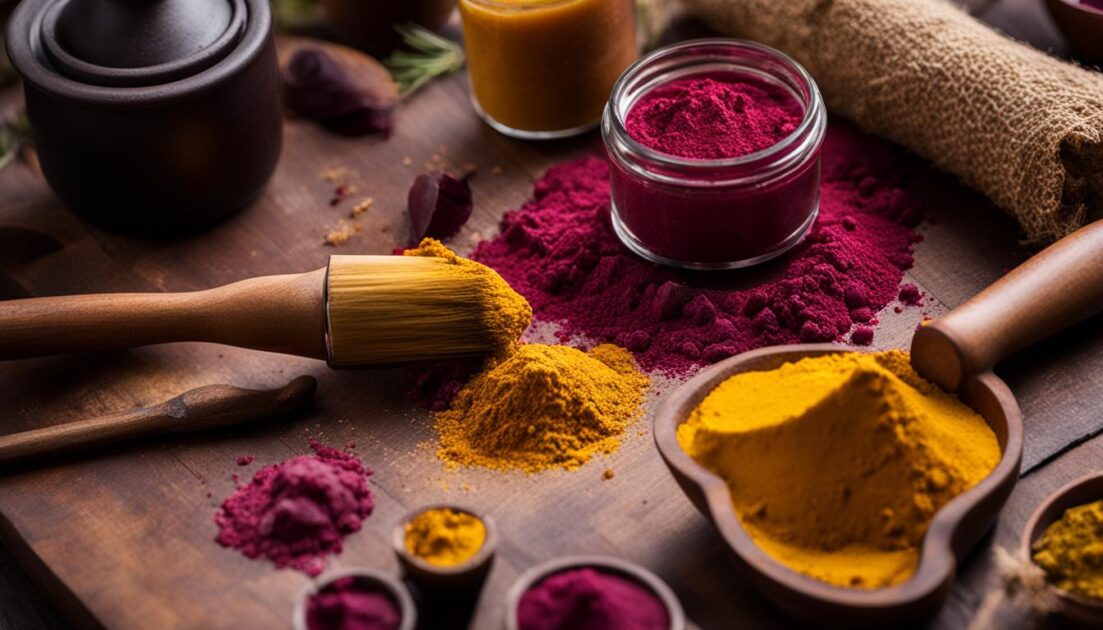
5. Natural Colorants
Adding natural colorants to your homemade lipstick allows you to customize the shade and achieve the desired color. Some popular natural colorants include beet powder, cocoa powder, and mica powder. These ingredients provide a range of hues, from soft pinks to deep reds, for a natural and personalized look.
By using these key ingredients, you can create a homemade lipstick that not only looks beautiful but also nourishes and protects your lips. Let your creativity shine as you experiment with different color combinations and enjoy the benefits of using all-natural ingredients.
| Ingredient | Function |
|---|---|
| Beeswax | Provides texture and structure |
| Shea Butter | Moisturizes and adds creaminess |
| Coconut Oil | Hydrates and adds shine |
| Vitamin E Oil | Heals, soothes, and acts as a preservative |
| Natural Colorants | Customizes the shade and adds pigment |

Step-by-Step Guide: How to Make Homemade Lipstick
Creating your own homemade lipstick is a rewarding and creative process. With just a few simple ingredients, you can customize your lipstick to your liking and ensure that it is made with natural and nourishing components. Follow the step-by-step instructions below to make your very own homemade lipstick.
- Melt the beeswax, shea butter, and coconut oil in a double boiler. This will help these ingredients blend together smoothly.
- Remove the mixture from heat and add your desired colorant, zinc oxide, vitamin E oil, and any optional essential oils. The colorant can be anything from beet powder for a beautiful pink shade, cocoa powder for a rich brown, or mica powder for a shimmering effect.
- Stir the mixture well until all ingredients are fully combined. This ensures that the color is evenly distributed and the lipstick has a smooth texture.
- Pour the mixture into lipstick molds or lip balm containers. If you don’t have specific molds, small tins or even clean, empty lip balm tubes can work just as well.
- Allow the lipstick to cool and harden overnight before use. This gives it enough time to set and ensures that it won’t melt or lose its shape when applied to your lips.
By following these simple steps, you can create your own personalized homemade lipstick that is free from harmful chemicals and tailored to your preferences. Experiment with different colorants and essential oils to create a variety of shades and scents. Enjoy the satisfaction of using a lipstick that you made yourself, knowing exactly what ingredients are in it and that it’s uniquely yours.
Storing and Using Homemade Lipstick
When it comes to homemade lipstick, proper storage and usage are key to preserving its quality and achieving the desired results. Here are some essential tips and options to help you store and use your homemade lipstick effectively.
Storing Homemade Lipstick
Homemade lipstick can be stored in various containers, depending on your preferences and convenience. The two common options are lip balm containers and lipstick molds.
If you choose to use lip balm containers, simply pour the melted lipstick into the tube and allow it to harden. These containers are portable and practical, making it easy to carry your homemade lipstick wherever you go.
On the other hand, if you opt for lipstick molds, follow these additional steps:
- Partially harden the lipstick mixture in the mold, ensuring it has a sturdy consistency.
- Drill a hole in the partially hardened lipstick to accommodate the guide or height adjuster.
- Transfer the partially hardened lipstick into the lipstick tube, using the guide to ensure accurate height and positioning.
Regardless of the container option you choose, it’s important to store your homemade lipstick in a cool and dry place. This helps maintain its texture, color, and overall effectiveness. Avoid exposing it to direct sunlight or excessive heat, as it may cause the lipstick to melt or lose its desired consistency.
Tips for Using Homemade Lipstick
Using your homemade lipstick correctly can enhance your overall look and ensure long-lasting wear. Here are some tips for using homemade lipstick effectively:
- Start with clean and dry lips: Before applying your homemade lipstick, ensure your lips are clean, free from any residue, and dry. This provides a smooth canvas for the lipstick application.
- Exfoliate and moisturize: For a flawless finish, exfoliate your lips gently with a homemade lip scrub and follow up with a lip balm to moisturize and hydrate.
- Apply with a lip brush: Using a lip brush gives you more control over the application and helps distribute the lipstick evenly for a professional finish.
- Layer for intensity: If you desire a more intense color, apply multiple layers of the homemade lipstick, allowing each layer to dry before adding the next.
- Set with translucent powder: To extend the longevity of your homemade lipstick, lightly dust translucent powder over your lips after the application. This helps set the lipstick and prevents smudging.
By following these tips, you can achieve beautiful, natural-looking lips with your homemade lipstick.

Now that you know how to store and use your homemade lipstick, it’s time to experiment with different shades and enjoy the benefits of natural, chemical-free lip products.
Alternative Options: Buying Natural Lipstick
If you don’t have the time or desire to make your own homemade lipstick, there are several safe and natural lipstick options available for purchase. Look for brands that offer chemical-free and organic lipsticks, such as 100 percent pure Cocoa Butter Matte Lipstick, Axiology Bullet Lipstick, Henne Organic Lipstick, Bare Minerals Hydra-Soothing Lipstick, and Beauty Counter Color Intense Lipstick.

| Brand | Description | Price |
|---|---|---|
| 100 percent pure Cocoa Butter Matte Lipstick | Chemical-free and organic lipstick in a wide range of shades. Provides a matte finish and long-lasting color. | $35 |
| Axiology Bullet Lipstick | Luxurious, vegan, and natural lipstick available in various vibrant shades. Comes in eco-friendly packaging. | $30 |
| Henne Organic Lipstick | Premium organic lipstick with a smooth and creamy texture. Infused with nourishing oils for hydration. | $24 |
| Bare Minerals Hydra-Soothing Lipstick | Moisturizing and nourishing lipstick enriched with minerals and natural ingredients. Provides intense color payoff. | $20 |
| Beauty Counter Color Intense Lipstick | Highly pigmented and long-wearing lipstick made with safer, clean ingredients. Offers a variety of bold shades. | $32 |
Tips for Applying Homemade Lipstick
When it comes to applying your homemade lipstick, a few simple tips and techniques can make all the difference in achieving a flawless and long-lasting look. Follow these guidelines to enhance your lipstick application:
1. Prepare Your Lips
Before applying homemade lipstick, it’s essential to ensure that your lips are dry, clean, and free of any flaky skin. Gently exfoliate your lips with a lip scrub or a soft toothbrush to remove any dead skin cells. This will help create a smooth canvas for the lipstick and prevent it from settling into fine lines.

2. Prime Your Lips
To enhance the color payoff and longevity of your homemade lipstick, consider priming your lips beforehand. You can use a concealer or a lip primer to create a base that helps the lipstick adhere better and appear more vibrant. Another option is lightly misting your lips with a setting spray, which can also amplify the color intensity.
3. Use a Lip Brush
While applying lipstick directly from the tube can be convenient, using a lip brush can extend the wear time and precision of your homemade lipstick. A lip brush allows for more control and enables you to achieve a more defined lip shape. Start by outlining your lips with the brush and then fill in the color for a seamless and polished finish.
4. Prevent Smudging
To prevent your homemade lipstick from smudging or feathering, consider applying a natural lip gloss or a nude lip liner over the lipstick. This additional step helps create a barrier and keeps the color in place throughout the day. Choose a lip gloss or liner that complements the shade of your homemade lipstick for a cohesive and long-lasting look.
By following these tips, you can master the art of applying homemade lipstick and enjoy a beautiful, long-lasting color that enhances your natural beauty.
Additional DIY Lipstick Recipes
Looking for more homemade lipstick recipes to experiment with? Try these variations to create unique shades and formulations:
1. Beetroot Lipstick
Add a natural pink tint to your homemade lipstick by using beetroot. Grate a small piece of fresh beetroot and extract its juice. Mix the beetroot juice with your basic homemade lipstick recipe to achieve a beautiful pink shade.
2. Berry and Pomegranate Lipstick
Create a nourishing lip color by using berries and pomegranate seeds. Crush a handful of berries, such as raspberries or strawberries, along with a few pomegranate seeds. Mix this pulp with your homemade lipstick recipe for a vibrant, fruity hue.
3. Rose Petal Lipstick
Achieve a gorgeous pink tint by using rose petals. Crush a few dried rose petals into a fine powder and mix it with your basic homemade lipstick recipe. This will give your lipstick a subtle pink hue and a pleasant floral scent.
4. Cinnamon Nude Lipstick
Create a natural nude lipstick by using cinnamon powder. Mix a pinch of cinnamon powder with your basic homemade lipstick recipe to achieve a warm and neutral shade. This cinnamon-infused lipstick will give your lips a subtle, earthy tone.
Feel free to explore these DIY lipstick recipes to find your favorite shades and formulations. Get creative and experiment with different natural ingredients to customize your own lipsticks.

| DIY Lipstick Recipes | Ingredients | Color Result |
|---|---|---|
| Beetroot Lipstick | Basic Homemade Lipstick + Beetroot Juice | Natural Pink Tint |
| Berry and Pomegranate Lipstick | Basic Homemade Lipstick + Crushed Berries + Pomegranate Seeds | Vibrant Fruity Hue |
| Rose Petal Lipstick | Basic Homemade Lipstick + Crushed Dried Rose Petals | Gorgeous Pink Tint |
| Cinnamon Nude Lipstick | Basic Homemade Lipstick + Cinnamon Powder | Warm and Neutral Shade |
Conclusion
Making your own homemade lipstick using natural ingredients is a rewarding and beneficial endeavor. By taking control of the ingredients, you can ensure that your lipstick is free from potentially harmful chemicals commonly found in conventional lipsticks. This allows you to prioritize your health and well-being while still enjoying the beauty of vibrant and nourished lips.
One of the key advantages of making your own homemade lipstick is the ability to customize the color to suit your preferences. Whether you desire a bold and dramatic shade or a subtle and natural hue, you can experiment with natural colorants to create a unique lipstick that complements your individual style.
Furthermore, opting for homemade lipstick allows you to embrace the world of natural beauty products. By avoiding synthetic ingredients and embracing the power of natural ingredients such as beeswax, shea butter, and coconut oil, you are embracing a more sustainable and eco-friendly approach to beauty. Not only will your lips look beautiful, but they will also feel nourished, hydrated, and cared for.
FAQ
What are the benefits of homemade lipstick?
Homemade lipstick is chemical-free and safe to use, unlike conventional lipsticks that may contain harmful ingredients. Additionally, you can customize the color and choose natural ingredients that nourish and hydrate your lips.
What ingredients do I need to make homemade lipstick?
The key ingredients for homemade lipstick include beeswax, shea butter, coconut oil, vitamin E oil, and a natural colorant. These ingredients provide texture, moisturize the lips, soothe chapped lips, and give the lipstick its desired color.
Can you provide a step-by-step guide on how to make homemade lipstick?
Of course! Here is a simplified version of the process: melt beeswax, shea butter, and coconut oil; remove from heat and add the remaining ingredients; stir well; pour the mixture into lipstick molds or lip balm containers; allow it to harden overnight before use.
How should I store and use homemade lipstick?
Homemade lipstick can be stored in lip balm containers or lipstick molds. If using lip balm containers, simply pour the melted lipstick into the tube and allow it to harden. If using lipstick molds, follow additional steps. Store the lipstick in a cool, dry place and apply it to dry, clean lips for best results.
Where can I buy natural lipstick if I don’t want to make my own?
There are several safe and natural lipstick options available for purchase. Look for brands that offer chemical-free and organic lipsticks, such as 100 percent pure Cocoa Butter Matte Lipstick, Axiology Bullet Lipstick, Henne Organic Lipstick, Bare Minerals Hydra-Soothing Lipstick, and Beauty Counter Color Intense Lipstick.
What are some tips for applying homemade lipstick?
Before applying homemade lipstick, ensure that your lips are dry, clean, and free of flaky skin. Prime your lips with a concealer or lightly mist them with a setting spray for enhanced color. Consider using a lip brush to apply the lipstick, as it can help it last longer. Applying a natural lip gloss or nude lip liner over the lipstick can prevent smudging.
Are there any alternative DIY lipstick recipes?
Yes! In addition to the basic homemade lipstick recipe, you can make lipsticks using beetroot for a natural pink tint, berries and pomegranate seeds for a nourishing lip color, rose petals for a gorgeous pink tint, or cinnamon powder for a nude lipstick. Explore these recipes to find your favorite shades and formulations.