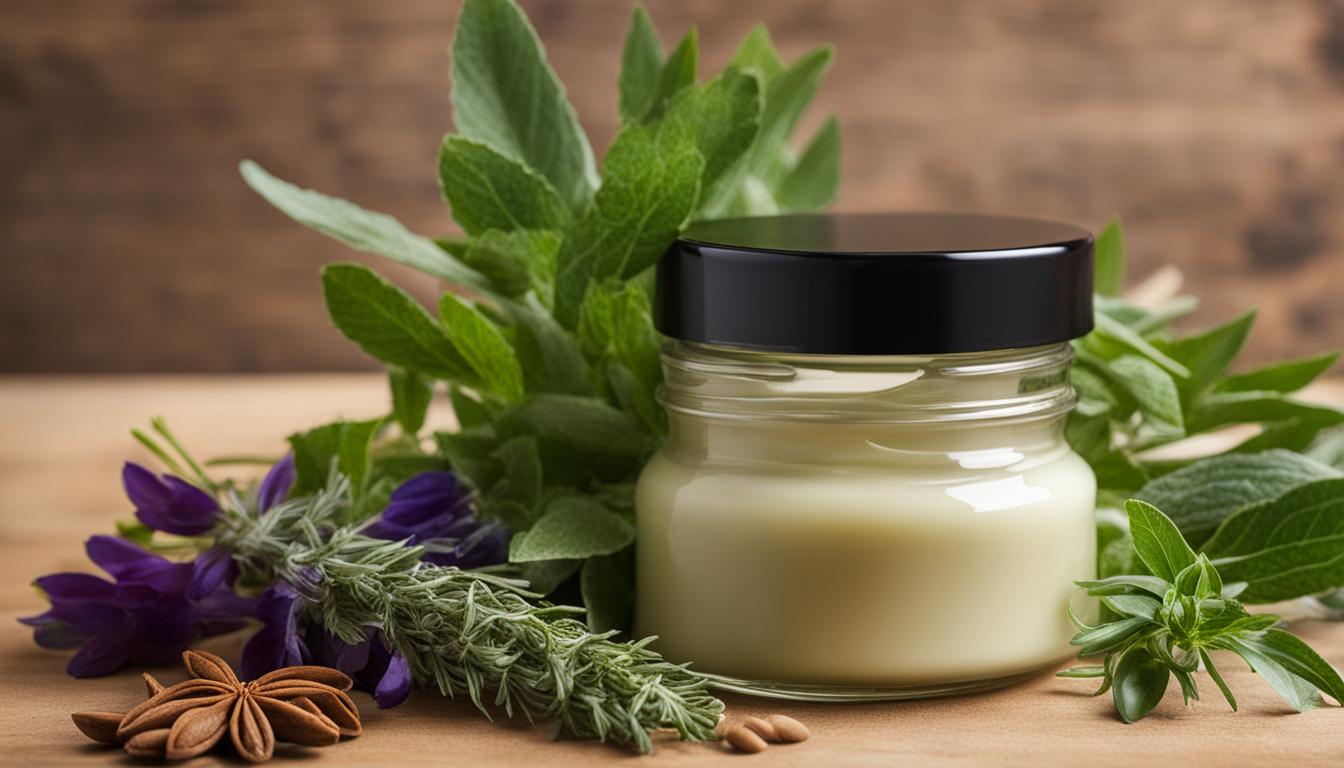
Have you ever wondered how to make lip gloss at home? Learn how to make homemade lip gloss with only 4-ingredients! This DIY lip gloss recipe is made with all-natural ingredients, is soothing to dry lips, and only costs pennies per tube to make.
The main ingredients needed to make lip gloss at home are olive oil, coconut oil, mango butter, and beeswax. You can customize your homemade lip gloss by adding in color as well as essential oils for a beautiful scent, added benefits, and flavor. Making your own lip gloss is a fun and cost-effective project that can be personalized to your preferences and makes for a great gift idea.
Key Takeaways:
- Homemade lip gloss can be made using natural ingredients.
- The main ingredients for DIY lip gloss are olive oil, coconut oil, mango butter, and beeswax.
- Customize your lip gloss by adding color and essential oils.
- Making your own lip gloss is a cost-effective and personalizable project.
- Enjoy the satisfaction of using a lip gloss free from harmful chemicals.
Step-by-Step Guide to Making Natural Lip Gloss
Making your own lip gloss at home is a fun and rewarding project that allows you to create a custom product using natural ingredients. Follow this step-by-step guide to make your very own all-natural lip gloss.

Gather Your Ingredients
To make natural lip gloss, you will need the following ingredients:
| Ingredient | Description |
|---|---|
| Carrier Oil | A nourishing oil that serves as the base of the lip gloss. Olive oil, coconut oil, sweet almond oil, avocado oil, jojoba oil, or grapeseed oil are excellent options. |
| Butter | A moisturizing butter that adds richness and helps solidify the lip gloss. Mango butter, shea butter, or cocoa butter work well. |
| Beeswax | A natural wax that provides structure and hold to the lip gloss. |
| Optional Essential Oils | For a delightful scent and added skincare benefits. Choose essential oils that are safe for lip application, such as peppermint, vanilla, or lavender. |
| Natural Coloring | If desired, you can add natural color to your lip gloss using skin-safe dyes, herbal powders, or kitchen ingredients like cocoa powder or beetroot powder. |
The Process
Follow these simple steps to make your natural lip gloss:
- In a double boiler, melt together the carrier oil, butter, and beeswax until fully melted.
- Remove the mixture from heat and stir in any optional essential oils for scent and added benefits.
- If desired, add natural coloring to achieve the desired shade. Start with a small amount and gradually add more until you reach the desired color.
- Pour the mixture into lip gloss tubes or small lip balm containers.
- Allow the lip gloss to cool and solidify completely.
Once your lip gloss has solidified, it’s ready to use! Apply it to your lips for a moisturizing, all-natural, and beautifully glossy finish.
Ingredients and Tools Needed for DIY Lip Gloss
Creating your own lip gloss at home is a fun and rewarding project that allows you to customize your beauty products with natural ingredients. To get started, you will need the following ingredients:
- 4 tablespoons of olive oil
- 2 tablespoons of fractionated coconut oil
- 2 tablespoons of mango butter
- 1 tablespoon of beeswax
- 10 drops of optional essential oil
- Natural coloring if desired
These lip gloss ingredients are not only easy to find but also have numerous benefits for your lips. Olive oil and coconut oil provide moisturizing properties, while mango butter nourishes and soothes dry lips. Beeswax acts as a natural emollient and helps to give the lip gloss its thick consistency.
Once you have gathered your ingredients, you will also need the following tools:
- A double boiler or small saucepan
- A glass measuring cup
- A whisk or spoon for stirring
- A funnel for pouring the mixture into lip gloss tubes or small lip balm containers
The double boiler or small saucepan will be used to melt the ingredients together, while the glass measuring cup allows for accurate and easy pouring. A whisk or spoon is necessary for stirring the mixture to ensure all the ingredients are well combined. Lastly, a funnel helps to transfer the lip gloss mixture into the containers without any mess.
Creating your own lip gloss at home is not only a great way to save money but also gives you full control over the ingredients and customization options. With just a few simple ingredients and tools, you can create a natural and personalized lip gloss that will keep your lips looking and feeling beautiful.
Now that you have gathered all the necessary ingredients and tools, it’s time to move on to the next section and learn the step-by-step process of making your own natural lip gloss at home.
Tips for Making Homemade Lip Gloss
When it comes to making your own lip gloss at home, there are a few key tips to keep in mind to ensure the best results. Follow these guidelines for a successful lip gloss making tutorial and natural lip care:
- Prepare your materials in advance: Before you start making your homemade lip gloss, gather all the necessary ingredients and tools. Having everything ready and within reach will help you work efficiently.
- Keep lip gloss containers open and upright: To make pouring easier, leave your lip gloss tubes or containers open and in an upright position. This will prevent any spillage or mess during the filling process.
- Adjust the consistency with beeswax: The amount of beeswax you use in your lip gloss recipe will affect its thickness. If you prefer a thicker gloss, increase the amount of beeswax. For a more liquid consistency, reduce the amount of beeswax.
- Consider storing lip gloss in the refrigerator: If you live in a warm climate or want to extend the shelf life of your homemade lip gloss, store it in the refrigerator. This will help prevent melting and maintain its quality.
- Be cautious with essential oils: When adding essential oils to your lip gloss, be mindful of their safety for internal use. Some essential oils may not be suitable for ingestion and could cause harmful effects. Additionally, certain essential oils can cause photosensitivity, so avoid using them in lip gloss that will be exposed to sunlight.
Follow these tips to create your own natural lip gloss and enjoy the benefits of a personalized, homemade beauty product.
Adding Color to Homemade Lip Gloss
One of the great things about making your own natural lip gloss at home is the ability to customize the colors according to your preference. By using natural, skin-safe dyes, herbal powders, or even common kitchen ingredients, you can create a wide range of lovely hues for your lip gloss.
Here are some popular options for adding color to your homemade lip gloss:
| Color | Ingredients |
|---|---|
| Red | Beetroot powder |
| Orange | Ground paprika |
| Yellow | Ground ginger |
| Pink | Hibiscus powder |
| Green | Matcha powder |
| Brown | Cocoa powder |
Using these natural ingredients, you can achieve beautiful and vibrant colors for your lip gloss without relying on artificial dyes or chemicals.
Pro Tip: Start with a small amount of powder or dye and gradually add more until you achieve the desired color. This way, you have better control over the shade of your homemade lip gloss.
If you want to create a wider range of colors, you can also use mica powders or other skin-safe natural dyes. Experiment with different combinations and have fun exploring the possibilities!
Quotes:
“By using natural ingredients like beetroot powder, hibiscus powder, or cocoa powder, you can achieve stunning colors for your homemade lip gloss while avoiding potentially harmful chemicals.” – Lip Gloss Enthusiast
“Adding color to homemade lip gloss is a fantastic way to express your creativity and personalize your lip care routine. Plus, you’ll have the added peace of mind knowing that you’re using safe and natural ingredients on your lips.” – Beauty Blogger

References:
- “How to Make Natural Lip Gloss: A Beginner’s Guide” – Natural Beauty Magazine
- “The Benefits of Using Natural Ingredients in Lip Gloss” – Wellness Journal
Vegan and Wax-Free Lip Gloss Options
If you prefer a vegan or wax-free lip gloss, there are alternatives you can explore to create your homemade lip gloss without the use of beeswax or other animal-derived ingredients. Here are a few options to consider:
1. Soy Wax
Instead of beeswax, you can substitute it with soy wax in equal amounts. Soy wax is derived from soybean oil and is a popular vegan alternative in many beauty and skincare products. It provides a similar consistency to beeswax, giving your lip gloss a smooth and creamy texture.
2. Candelilla Wax
Candelilla wax is another excellent vegan alternative to beeswax. It is derived from the candelilla plant, a shrub native to Mexico. Similar to soy wax, you can use an equal amount of candelilla wax as a replacement for beeswax in your homemade lip gloss recipes. Candelilla wax adds a glossy finish to the lip gloss and helps to bind the ingredients together.
3. Omitting the Wax
If you prefer a more liquid lip gloss consistency, you can omit the wax altogether. This option is ideal if you enjoy a lightweight, non-greasy lip gloss that provides sheer color and shine. However, keep in mind that without wax, the lip gloss may not last as long on the lips and may require more frequent reapplication.
Experiment with these vegan and wax-free alternatives to find the texture and feel that suits your preferences. Whether you choose soy wax, candelilla wax, or go wax-free, you can still create a homemade lip gloss that nourishes and moisturizes your lips while remaining cruelty-free and customizable.

Shelf Life and Storage of Homemade Lip Gloss
When it comes to homemade lip gloss, one common concern is its shelf life. Since homemade lip gloss does not contain any water-based ingredients, it does not require a preservative. However, it’s essential to store it properly to maintain its quality and effectiveness.
The shelf life of homemade lip gloss is typically around 6 months when stored correctly. To maximize its longevity, store your lip gloss in a cool and dark place, away from direct sunlight and heat sources. The ideal storage temperature is around 60°F (15°C) to 70°F (21°C).
An airtight container is also crucial for preserving the lip gloss. This prevents air exposure, which can lead to oxidation and the deterioration of the natural ingredients. Consider using lip gloss tubes or small lip balm containers with secure lids to ensure the tightest seal and minimize air contact.
If you live in a warm climate or during the summer months, it’s advisable to store your homemade lip gloss in the refrigerator. The cool temperature helps to maintain the lip gloss’s consistency and prevents melting, ensuring that it stays fresh and usable for an extended period.
Storage Tips for Homemade Lip Gloss:
- Store in a cool, dark place with a temperature between 60°F (15°C) to 70°F (21°C).
- Use airtight containers, such as lip gloss tubes or small lip balm containers, to minimize air exposure.
- If living in a warm climate or during hot weather, store the lip gloss in the refrigerator.
Comparison of Shelf Life and Storage Methods
| Storage Method | Shelf Life | Recommended for |
|---|---|---|
| Cool, dark place (60°F-70°F) | Approximately 6 months | Most climates |
| Refrigerator | Slightly longer than 6 months | Warm climates or hot weather |
Proper storage ensures that your homemade lip gloss remains fresh, effective, and safe to use. Remember that natural ingredients have a shorter shelf life compared to commercial products, so it’s best to make smaller batches according to your usage. Enjoy the benefits of homemade lip gloss while taking care of your lips with natural ingredients.

Best Containers for Homemade Lip Gloss
When it comes to storing your homemade lip gloss, choosing the right containers is essential. Here are some options that are perfect for keeping your homemade lip gloss fresh and easily accessible:
Lip Gloss Tubes
Lip gloss tubes are a popular choice for storing homemade lip gloss. They come in different sizes and shapes, allowing you to find the perfect fit for your needs. These tubes usually have a wand applicator, making it easy to apply the lip gloss smoothly and evenly. Additionally, transparent or frosted lip gloss tubes allow you to see the color and texture of your homemade lip gloss, giving it a visually appealing look.
Squeezable Lip Gloss Containers
If you prefer a different option, consider using squeezable lip gloss containers. These containers typically have a small opening at the top, allowing you to squeeze out the desired amount of lip gloss. They are great for those who prefer a more controlled application method and can be easily carried in your purse or pocket.
Small Lip Balm Containers
Another practical storage solution for homemade lip gloss is small lip balm containers. These containers are compact and usually have a screw-top lid, ensuring that the lip gloss stays securely sealed. They are convenient to use and can be easily refilled when needed.
When choosing containers for your homemade lip gloss, it’s important to consider their ease of use. Look for containers that are easy to open and close, ensuring that your lip gloss remains fresh and doesn’t leak. Additionally, consider the size and shape of the containers to ensure that they are suitable for your preferences and storage needs.
Now that you have the perfect containers for your homemade lip gloss, you can enjoy the convenience and satisfaction of creating your own personalized beauty products.

Conclusion
Making your own natural DIY lip gloss at home allows you to have complete control over the ingredients you use, ensuring that you are using safe and natural products on your lips. By customizing the colors and scents, you can create a lip gloss that perfectly matches your preferences and style. Using just a few simple and natural ingredients, you can make a nourishing and moisturizing lip gloss that not only adds a hint of color but also provides a glossy finish.
The process of making homemade lip gloss is not only fun, but it also allows you to experiment with different combinations of carrier oils, butters, essential oils, and natural coloring. This means you can personalize your lip gloss to find the perfect formulation that suits your needs. Say goodbye to store-bought lip glosses that may contain harmful chemicals and embrace the satisfaction of using a product that is gentle on your lips and free from any unwanted ingredients.
Creating your own lip gloss is a creative and cost-effective project that can bring immense satisfaction. With the ability to choose natural ingredients and avoid harsh chemicals, you can nourish your lips while also looking fabulous. Whether you’re looking to hydrate dry lips, enhance your natural beauty, or simply enjoy the process of making your own beauty products, homemade lip gloss is a fantastic option. So why wait? Start experimenting today and enjoy the benefits of making your own natural DIY lip gloss at home.
FAQ
How do I make lip gloss at home with natural ingredients?
To make lip gloss at home with natural ingredients, you will need a carrier oil (such as olive oil, coconut oil, sweet almond oil, avocado oil, jojoba oil, or grapeseed oil), a butter (such as mango butter, shea butter, or cocoa butter), beeswax, optional essential oils for scent and added benefits, and natural coloring if desired. Melt the carrier oil, butter, and beeswax together, remove from heat, and stir in essential oils and coloring. Pour the mixture into lip gloss tubes or small lip balm containers and allow to cool and solidify.
What ingredients and tools do I need to make DIY lip gloss?
To make DIY lip gloss, you will need 4 tablespoons of olive oil, 2 tablespoons of fractionated coconut oil, 2 tablespoons of mango butter, 1 tablespoon of beeswax, 10 drops of optional essential oil, natural coloring if desired, as well as empty lip gloss tubes or small lip balm containers. You will also need a double boiler or small saucepan and glass measuring cup for melting the ingredients, a whisk or spoon for stirring, and a funnel for pouring the mixture into the containers.
Any tips for making homemade lip gloss?
When making homemade lip gloss, it’s important to work quickly as the ingredients can harden fast. Have all your materials and containers ready before starting and keep your lip gloss tubes or containers open and upright for easy pouring. Adjust the consistency by altering the amount of beeswax used. Consider storing your lip gloss in the refrigerator if you live in a warm climate. Use essential oils safely and avoid hot essential oils that may cause skin irritation.
How can I add color to homemade lip gloss?
You can add color to homemade lip gloss using natural skin-safe dyes, herbal powders, or common kitchen ingredients like cocoa powder or beetroot powder. Start with a small amount and gradually add more until you achieve the desired color. Popular natural options include beetroot powder for red, ground paprika for orange, ground ginger for yellow, hibiscus powder for pink, matcha powder for green, and cocoa powder for brown. Mica powders or skin-safe natural dyes can also be used for a wider range of colors.
Are there vegan and wax-free lip gloss options?
Yes, if you prefer a vegan or wax-free lip gloss, you can substitute beeswax with soy wax or candelilla wax in equal amounts. This will provide a similar consistency without the use of animal-derived ingredients. You can also omit the wax altogether for a more liquid lip gloss. Experiment with different wax alternatives to find the texture and feel that you prefer.
How long does homemade lip gloss last and how should it be stored?
Homemade lip gloss, when stored in a cool, dark place in an airtight container, has a shelf life of around 6 months. Storing it in the refrigerator can extend its shelf life, especially in warm climates. Keep in mind that natural ingredients may have a shorter shelf life compared to commercial products, so it’s best to make smaller batches and use them within a reasonable timeframe.
What are the best containers for homemade lip gloss?
Various options for storing homemade lip gloss include lip gloss tubes, squeezable lip gloss containers, or small lip balm containers. Avoid using roller top tubes as these may not work well with the thicker consistency of homemade lip gloss. Choose containers that are easy to open and close, and consider transparent or frosted containers to see the color and texture or opaque containers for a more professional appearance.
How can I make my own natural DIY lip gloss at home?
Making your own natural DIY lip gloss at home allows you to control the ingredients and customize the colors and scents to match your preferences. With just a few simple and natural ingredients, you can create a nourishing and moisturizing lip gloss that provides a hint of color and a glossy finish. Experiment with different combinations of carrier oils, butters, essential oils, and natural coloring to create your perfect homemade lip gloss. Enjoy the process and the satisfaction of using a lip gloss that is free from harmful chemicals and gentle on your lips.