A facial is a popular skin treatment that involves cleansing, exfoliating, steaming, applying a mask, toning, and moisturizing. With the right tools and ingredients, you can easily create a DIY facial at home using natural ingredients from your pantry. Not only is it an affordable option, but it also allows you to pamper yourself with a pure and effective facial routine.
Key Takeaways:
- Learn how to do a facial at home by yourself using natural ingredients
- Create a DIY facial routine that is affordable and effective
- Pamper yourself with a natural and relaxing at-home facial treatment
- Customize your skincare routine based on your unique needs and preferences
- Discover the benefits of using natural ingredients for your skin
What Can I Use for a Facial at Home?
When doing a facial at home, you have the flexibility to use skincare products you already have on hand. The basic steps for a facial include cleansing, exfoliating, steaming, applying a mask, toning, and moisturizing. However, if you want to go the extra mile, you can add an extraction step.
Some essential tools and ingredients you’ll need for a facial at home include:
- A cleanser to remove dirt and impurities from your skin.
- An exfoliating scrub to gently slough off dead skin cells.
- Steam to open up your pores and promote deep cleansing.
- Extraction tools if you want to remove blackheads or whiteheads.
- A facial mask, either a store-bought product or a homemade blend, to nourish and hydrate your skin.
- A toner to balance your skin’s pH levels and tighten your pores.
- A moisturizer to keep your skin hydrated and supple.
By using these natural facial ingredients and following the proper steps, you can create a rejuvenating DIY facial experience in the comfort of your own home.

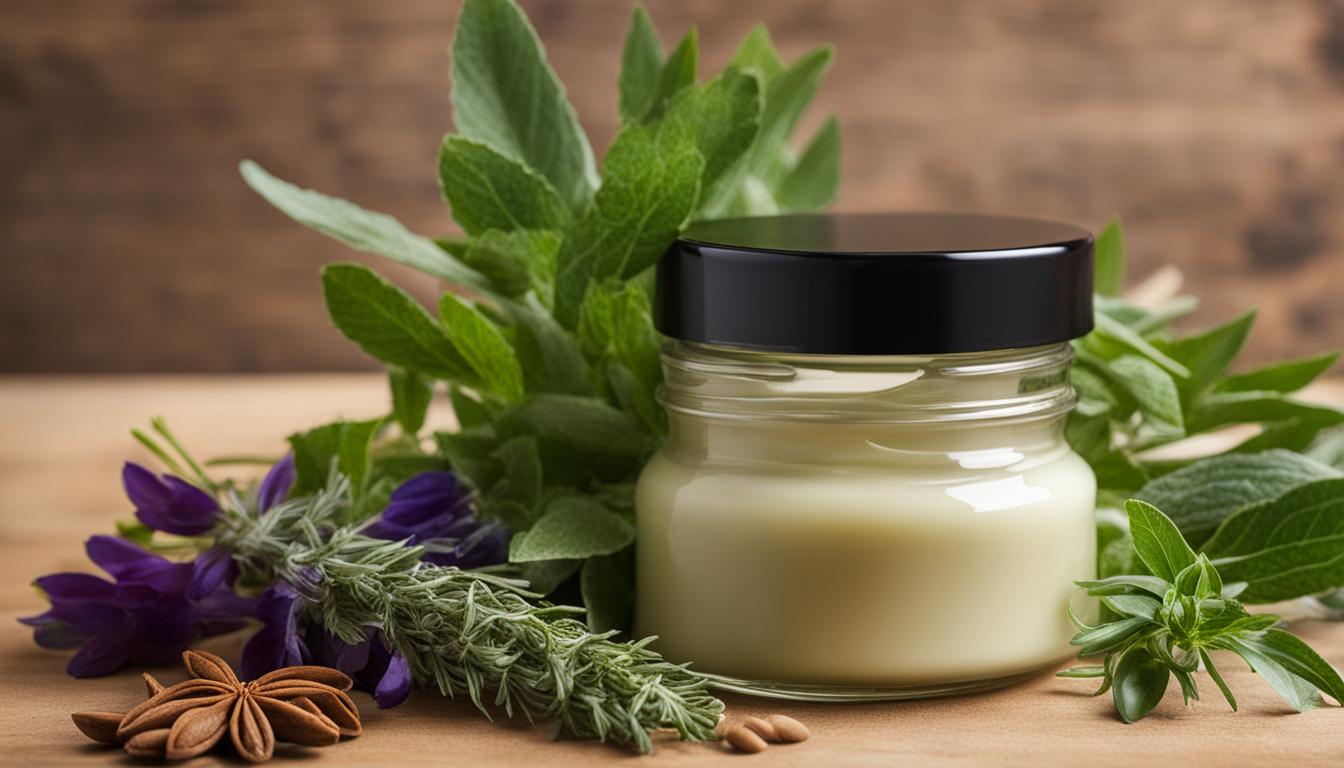
Note: The image above showcases a variety of natural ingredients commonly used in homemade facials.
Homemade Facial Scrubs
If you’re looking for effective exfoliating options but don’t have a store-bought scrub on hand, don’t worry! You can easily create homemade facial scrubs using ingredients from your kitchen. These scrubs not only help remove dead skin cells, but they also provide additional benefits such as soothing, moisturizing, and brightening.
Honey and Oats Scrub
One popular homemade facial scrub is the honey and oats scrub. To make this scrub, simply mix together equal parts honey and finely ground oats. Apply the scrub to your face using gentle circular motions, then rinse off with warm water. This scrub not only exfoliates but also helps soothe and hydrate the skin.
Tea Tree Oil and Sugar Scrub
Another great option is the tea tree oil and sugar scrub. Combine a few drops of tea tree oil with a tablespoon of sugar to create a paste. Massage the scrub onto your face using gentle upward strokes, focusing on areas with acne or blemishes. Rinse thoroughly with cool water to reveal smoother and clearer skin.
Brown Sugar and Coconut Oil Scrub
A third homemade facial scrub to try is the brown sugar and coconut oil scrub. Mix together equal parts brown sugar and coconut oil to create a thick paste. Gently massage the scrub onto your face in circular motions, being mindful of any sensitive areas. Rinse off with warm water to reveal a radiant and moisturized complexion.
By utilizing these homemade facial scrub recipes, you can achieve a naturally glowing and healthy-looking complexion from the comfort of your own home.
| Homemade Facial Scrubs | Key Ingredients | Main Benefits |
|---|---|---|
| Honey and Oats Scrub | Honey, Finely ground oats | Exfoliation, Soothing, Hydrating |
| Tea Tree Oil and Sugar Scrub | Tea tree oil, Sugar | Exfoliation, Acne-fighting, Clarifying |
| Brown Sugar and Coconut Oil Scrub | Brown sugar, Coconut oil | Exfoliation, Moisturizing, Radiance-enhancing |

DIY Face Masks
One of the best aspects of a homemade facial is the opportunity to create your very own face masks using natural ingredients found in your kitchen. These masks not only provide a luxurious and relaxing experience, but they also offer a range of skin benefits that can enhance your facial routine.
When it comes to creating DIY face masks, the possibilities are endless. You can tailor your mask to address specific skin concerns or simply indulge in a nourishing and pampering treatment. Here are some popular homemade face mask combinations:
Milk and Honey Face Mask
This mask is a classic choice for hydration and brightening. The combination of milk and honey helps to moisturize the skin, leaving it soft and supple.
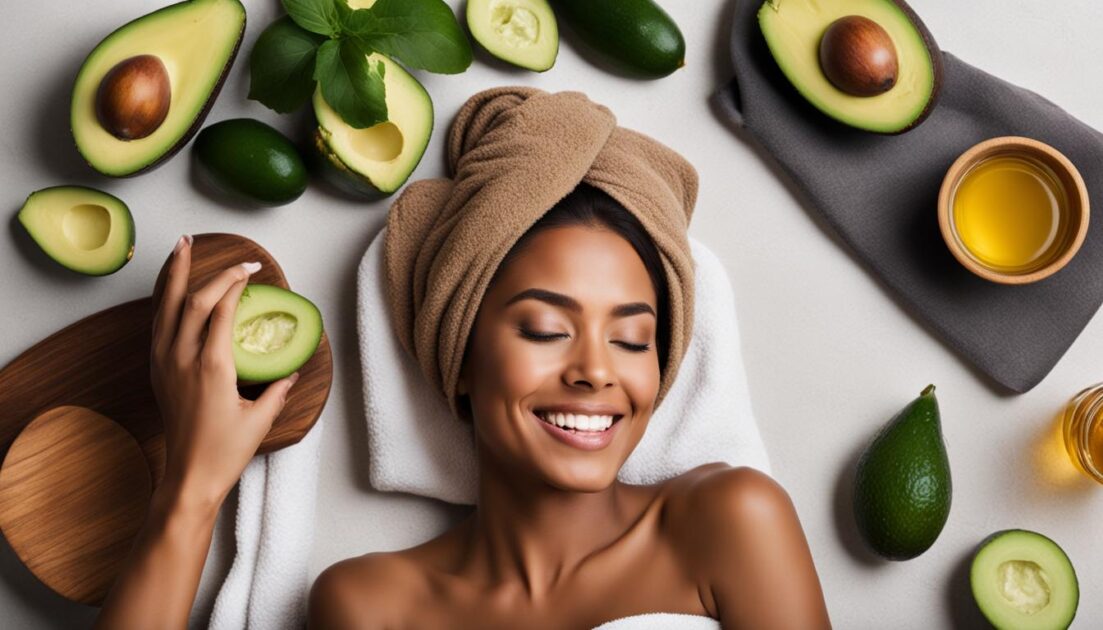
Honey and Avocado Face Mask
Avocado is known for its nourishing properties, while honey is revered for its antibacterial and moisturizing benefits. Together, these ingredients create a mask that deeply hydrates the skin and promotes a healthy glow.
Oats and Honey Face Mask
If you’re looking for a gentle exfoliating mask, oats and honey are the perfect combination. Oats help to slough off dead skin cells, while honey soothes and moisturizes the skin.
Yogurt and Strawberries Face Mask
Strawberries are rich in antioxidants that can help brighten the complexion, while yogurt provides a soothing and moisturizing effect. This mask is perfect for achieving a radiant and refreshed look.
Tomato and Cucumber Face Mask
Tomatoes are known for their astringent properties, which can help tighten and tone the skin. Cucumber, on the other hand, is refreshing and hydrating. Together, they create a mask that revitalizes and rejuvenates the skin.
These homemade face masks can be easily prepared by blending the ingredients together and applying the mixture to your face. Leave the mask on for the recommended time, usually around 15-20 minutes, and then rinse off with lukewarm water. Follow with your favorite toner and moisturizer to lock in the benefits of the mask.
Experiment with different combinations and find the masks that work best for your skin. Remember to always patch test new ingredients and adjust the recipes according to your skin’s needs. Enjoy the process of creating your own skincare treatments and reap the rewards of a natural and effective facial routine.

How to Give Yourself a Facial at Home
To give yourself a facial at home, follow these steps:
- Cleanse your face: Start by washing your face with a gentle cleanser to remove dirt and impurities. Pat your skin dry with a clean towel.
- Exfoliate to remove dead skin cells: Use a DIY facial scrub or a store-bought exfoliator to gently massage your skin in circular motions. Rinse off with lukewarm water.
- Steam your face to open up pores: Fill a bowl with hot water and place a towel over your head to create a steam tent. Allow the steam to penetrate your skin for 5-10 minutes.
- Apply a mask to nourish and hydrate your skin: Choose a homemade face mask or a natural product that suits your skin type. Massage the mask onto your face and leave it on for the recommended time.
- Tone your skin to close the pores: Apply a natural toner, such as rose water or witch hazel, using a cotton pad. Gently swipe it across your face to remove any mask residue and tone your skin.
- Moisturize to keep your skin hydrated: Finish off your DIY facial by applying a moisturizer that suits your skin type. Massage it into your skin using upward strokes.
Each step should be done using natural ingredients and gentle techniques to avoid any skin irritation. A DIY facial is a great way to pamper yourself and maintain healthy, glowing skin right from the comfort of your own home.
Benefits of DIY Facials at Home
Doing facials at home has several benefits. It allows you to save money and time by using ingredients you already have. DIY facials also give you the freedom to customize your skincare routine based on your skin type and concerns. Additionally, the act of self-care and pampering can help reduce stress and promote relaxation, leading to an overall sense of well-being.
Save Money and Time
One of the significant advantages of doing facials at home is the cost-effectiveness. Instead of spending money on expensive spa treatments, you can utilize ingredients readily available in your pantry or fridge. This way, you can achieve a luxurious facial experience without breaking the bank.
Customize Your Skincare Routine
With at-home facials, you have the flexibility to tailor your skincare routine according to your specific skin type, concerns, and preferences. Whether you have oily, dry, combination, or sensitive skin, you can choose the ingredients and products that work best for you. By personalizing your facial routine, you can address your skin’s unique needs and achieve optimal results.
Self-Care and Relaxation
Engaging in a DIY facial at home is not just about skincare; it’s a form of self-care and a chance to indulge in relaxation. The act of taking care of your skin can be a therapeutic experience, allowing you to unwind, destress, and recharge. By creating a serene and peaceful environment, complete with calming scents and soothing music, you can enhance the relaxation benefits of your DIY facial.
“Taking care of yourself is an essential part of maintaining overall well-being. Incorporating self-care activities, such as at-home facials, into your routine can have a positive impact on both your physical and mental health.”
Source: Dr. Samantha Lopez, Dermatology Specialist
By practicing self-care through DIY facials, you can give yourself the attention you deserve and prioritize your well-being. The combination of nourishing your skin, taking time for yourself, and promoting relaxation can contribute to a healthier and happier you.

Creating a tranquil environment, using natural ingredients, and following a personalized skincare routine are key elements to reap the numerous benefits of DIY facials at home. Allow yourself the opportunity to treat your skin to a rejuvenating experience while embracing self-care.
Skincare Tips for DIY Facials
When doing a DIY facial at home, it’s essential to follow some skincare tips to ensure optimal results and avoid any potential skin issues. Here are the key tips to keep in mind for an effective at-home facial routine:
- Cleanse your face thoroughly: Start by cleansing your face with a gentle cleanser to remove dirt, oil, and impurities. This step prepares your skin for the next stages of the facial.
- Use gentle exfoliation techniques: Choose a mild exfoliator that suits your skin type and gently exfoliate your skin in circular motions. Exfoliation helps remove dead skin cells, unclog pores, and promote a brighter complexion.
- Be cautious with steaming: Steaming is a crucial step in a facial as it helps open up the pores and allows better product penetration. However, be cautious not to expose your skin to excessive heat to prevent skin damage. Maintain a safe distance and limit the duration of the steam.
- Avoid aggressive extraction if you’re a beginner: Extraction can be beneficial for removing blackheads and whiteheads but should be done with caution. If you’re new to extraction, it’s best to leave this step to the professionals until you’re familiar with the technique and potential risks.
- Massage your face with gentle upward strokes: During the facial, incorporate a facial massage using gentle upward strokes. This technique helps improve blood circulation, relax facial muscles, and promote a youthful glow.
- Choose the right face mask for your skin type: Select a face mask that addresses your specific skin concerns. Whether it’s hydration, brightening, soothing, or anti-aging, opt for a mask that suits your skin type and desired results.
- Use natural toners: After removing the face mask, follow up with a natural toner to restore your skin’s pH balance and tighten the pores. Look for toners with natural ingredients like witch hazel, rose water, or green tea.
- Moisturize your skin to keep it hydrated: Finish off your facial routine by applying a moisturizer suitable for your skin type. Hydration is key to maintaining healthy and glowing skin, so choose a moisturizer that provides the necessary nourishment.
By following these skincare tips, you can enhance the effectiveness of your at-home facial routine and achieve healthy, radiant skin.

Facial Routine for Different Skin Types
Different skin types require different approaches when it comes to facials. Whether you have oily, dry, combination, or sensitive skin, tailoring your facial routine to your specific needs is essential for achieving optimal results.
Oily Skin:
For those with oily skin, it’s important to choose oil-free cleansers and masks that help control excess oil production. Look for products that contain ingredients like salicylic acid or tea tree oil, which can help regulate sebum production and keep your skin looking fresh and shine-free.
Dry Skin:
If you have dry skin, focus on using hydrating cleansers and masks that provide moisture to your skin. Look for ingredients like hyaluronic acid, glycerin, or ceramides, which help replenish and lock in moisture, leaving your skin plump and nourished.
Combination Skin:
Combination skin requires a balanced approach, as different areas of your face may have varying needs. Use a gentle cleanser that doesn’t strip away moisture and opt for a combination of oil-free and hydrating masks. Consider using different products on specific areas where you have more oil or dryness.
Sensitive Skin:
If you have sensitive skin, it’s crucial to choose gentle and soothing ingredients that won’t cause irritation. Look for products that are fragrance-free and formulated without harsh chemicals. Ingredients like aloe vera, chamomile, or oatmeal can help calm and nourish your skin without causing any adverse reactions.
Remember, understanding your skin type and using the right products is key to maintaining a healthy and radiant complexion. By customizing your facial routine based on your skin’s needs, you can achieve the best results and promote overall skin wellness.
| Skin Type | Recommended Cleansers | Recommended Masks |
|---|---|---|
| Oily Skin | Oil-free cleansers with salicylic acid or tea tree oil | Oil-absorbing masks with clay or charcoal |
| Dry Skin | Hydrating cleansers with hyaluronic acid or glycerin | Moisturizing masks with ingredients like honey or avocado |
| Combination Skin | Gentle cleansers suitable for all skin types | Oil-free masks for oily areas, hydrating masks for dry areas |
| Sensitive Skin | Fragrance-free and gentle cleansers | Soothing masks with ingredients like aloe vera or chamomile |
When to Get Professional Facials
While DIY facials at home can be effective, there may still be instances when it’s beneficial to seek professional facials from skincare professionals. Professional facials offer specialized treatments and advanced techniques that can address specific skin concerns. If you have complex skincare issues or want more intensive treatments, it may be worthwhile to schedule a professional facial.
During a professional facial, skincare professionals use their expertise to analyze your skin and recommend personalized treatments based on your unique needs. They have access to professional-grade products and equipment that can deliver noticeable results.
Professional facials offer a range of benefits, including:
- Deep cleansing: Skincare professionals have access to professional tools and products that can thoroughly cleanse your skin, removing impurities and unclogging pores.
- Targeted treatments: If you have specific skin concerns such as acne, aging, or hyperpigmentation, skincare professionals can tailor treatments to address those issues effectively.
- Advanced techniques: Professionals are trained in various facial techniques like lymphatic drainage massage and microdermabrasion, which can improve circulation, promote cell turnover, and enhance your skin’s overall appearance.
- Relaxation and self-care: Getting a professional facial not only provides visible skincare benefits but also allows you to relax and indulge in a pampering experience that promotes stress relief and self-care.
Additionally, professional skincare providers can offer expert advice on skincare routines, product recommendations, and lifestyle changes to maintain healthy, glowing skin.
Before scheduling a professional facial, it’s essential to research and choose a reputable skincare professional or esthetician. Consider their qualifications, experience, and client reviews to ensure you receive the best possible treatment.

Remember that professional facials may be more expensive than DIY facials. However, the investment can be worth it if you’re seeking advanced skincare solutions or have specific concerns that require professional attention.
Precautions and Side Effects
When performing facials at home, it’s crucial to take certain precautions to avoid any potential side effects. Your skin is delicate and requires gentle care to ensure optimal results. Here are a few guidelines to follow:
- Be gentle with your skin: While it’s tempting to scrub vigorously, avoid excessive rubbing or pulling, as it can irritate and damage your skin.
- Avoid over-exfoliation: Exfoliating helps remove dead skin cells, but doing it too often can lead to redness, sensitivity, and dryness. Stick to a gentle exfoliation routine once or twice a week.
- Choose ingredients suitable for your skin type: Different skin types have specific needs. Research and select ingredients that will address your skin concerns effectively.
- Perform patch tests before using new ingredients: To avoid allergic reactions or adverse effects, always patch test new ingredients on a small area of your skin before applying them to your whole face. Wait 24 hours and monitor your skin’s reaction.
“Proper precautions and careful selection of ingredients can help minimize the risk of facial side effects.” – Expert
If you experience any adverse reactions such as redness, itching, or swelling, discontinue use immediately. Persistent or severe side effects should be addressed by a dermatologist or skincare professional.
| Side Effects | Precautions |
|---|---|
| Redness and irritation | Be gentle with your skin and avoid harsh ingredients or excessive scrubbing. |
| Dryness and flakiness | Moisturize your skin adequately after a facial and use hydrating ingredients. |
| Breakouts or acne flare-ups | Avoid comedogenic ingredients and cleanse your skin thoroughly to prevent clogged pores. |
| Allergic reactions | Perform a patch test before using unfamiliar ingredients, especially if you have sensitive skin. |
Remember, everyone’s skin is unique, and what works for one person may not work for another. Pay attention to how your skin responds and adjust your facial routine accordingly. By being cautious and attentive, you can enjoy the benefits of a DIY facial while minimizing the risk of side effects.

Conclusion
DIY facials at home using natural ingredients offer a delightful way to indulge in self-care while enhancing the health of your skin. By following the correct steps, utilizing suitable tools and ingredients, and taking necessary precautions, you can establish a soothing and efficient facial routine in the comfort of your own home. It is important to tune in to your skin’s requirements and adapt your regimen accordingly to achieve optimal results.
Performing a DIY facial allows you to pamper yourself without breaking the bank. You can utilize the ingredients already available in your kitchen to create effective skincare treatments. Additionally, DIY facials offer the flexibility to tailor your routine based on your specific skin type and concerns, ensuring personalized care.
The blend of relaxation, skincare, and self-care that comes with DIY facials can help to reduce stress and promote overall well-being. By investing time in nurturing your skin, you are investing in yourself. So, grab your favorite natural ingredients, follow the steps outlined above, and treat yourself to a rejuvenating facial experience right at home.
FAQ
What is a facial?
A facial is a popular skin treatment that involves cleansing, exfoliating, steaming, applying a mask, toning, and moisturizing.
What ingredients can I use for a facial at home?
You can use natural ingredients from your pantry such as honey, oats, tea tree oil, sugar, avocado, yogurt, strawberries, tomato, and cucumber.
How can I make homemade facial scrubs?
You can make homemade facial scrubs using ingredients like honey and oats, tea tree oil and sugar, and brown sugar and coconut oil.
What are some DIY face mask options?
Some DIY face mask options include milk and honey, honey and avocado, oats and honey, yogurt and strawberries, and tomato and cucumber.
How do I give myself a facial at home?
To give yourself a facial at home, follow these steps: cleanse your face, exfoliate, steam, apply a mask, tone, and moisturize.
What are the benefits of DIY facials at home?
DIY facials at home are affordable, customizable, and promote relaxation and self-care.
What skincare tips should I keep in mind for DIY facials?
Skincare tips for DIY facials include thorough cleansing, gentle exfoliation, cautious steaming, avoiding aggressive extraction, gentle massage, choosing the right face mask, using natural toners, and moisturizing.
What facial routine should I follow for different skin types?
For oily skin, use oil-free cleansers and masks. For dry skin, use hydrating cleansers and masks. For combination skin, use a balanced approach. For sensitive skin, use gentle and soothing ingredients.
When should I get professional facials?
It is beneficial to seek professional facials if you have complex skincare issues or want more intensive treatments.
What precautions should I take for DIY facials at home?
Precautions for DIY facials include being gentle with your skin, avoiding over-exfoliation, choosing suitable ingredients for your skin type, and performing patch tests.
What are the possible side effects of facial treatments?
Common side effects of facial treatments include redness, irritation, and breakouts. If you experience any persistent issues, consult a dermatologist.