Stuck in the house and can’t go to the spa? Who says you can’t still have a little spa treatment and pamper yourself? Being stuck indoors just makes this the perfect time for a DIY facial at home. The best part is that it’s simple, enjoyable, and effective, using ingredients you probably already have on hand.
Key Takeaways:
- Learn how to give yourself a spa-like facial at home with natural ingredients.
- Discover homemade facial recipes using everyday ingredients.
- Understand the step-by-step process of a DIY facial at home.
- Explore the benefits of a natural skincare routine.
- Find out how to make your own facial masks and scrubs.
- Experience the relaxation and rejuvenation of an organic facial treatment.
What Can I Use for a Facial at Home?
To give yourself a facial at home, you will need a few tools and ingredients. Consider this your homemade facial kit, reporting for duty. Before starting your home facial, gather your favorite cleanser, exfoliating scrub, water or tea for steaming, essential oils (optional), sanitized extraction tools, facial mask product or blend, liquid for toning, and your favorite moisturizer.
Creating an at-home facial experience is easier than you might think. By using natural facial ingredients and homemade face scrubs, you can achieve a rejuvenating and organic facial treatment. These DIY methods allow you to take control of your skincare routine and pamper yourself with nourishing and gentle ingredients.
Start by selecting a cleanser that suits your skin type. Whether it’s a creamy cleanser, gel cleanser, or even a natural ingredient like honey or coconut oil, choose a cleanser that effectively cleans and refreshes your skin.
Next, exfoliate your skin to remove dead skin cells and reveal a radiant complexion. You can create homemade face scrubs using ingredients like sugar, coffee grounds, or oats. Gently massage the scrub onto your skin in circular motions, paying extra attention to areas prone to dryness or roughness.
Steaming is an essential step in a facial at home. It helps to open up the pores, making your skin more receptive to the benefits of subsequent treatments. For a facial steam, boil water or prepare a cup of herbal tea and place it in a heat-resistant bowl. Add a few drops of essential oils if desired, such as lavender or tea tree oil. Position your face above the steam, covering your head with a towel to trap the steam, and enjoy the relaxing and purifying effects.
Extraction is an optional but important step in a facial. Use sanitized extraction tools, such as blackhead extractors or comedone extractors, to gently remove any clogged pores or blackheads. Be cautious and gentle when performing extractions to avoid skin damage or irritation.
After steaming and extraction, it’s time to apply a facial mask. You can choose from a variety of facial masks with natural ingredients. Some popular options include clay masks, sheet masks, or homemade blends using ingredients like honey, avocado, or yogurt. Apply the mask evenly to your face, avoiding the eye and mouth areas. Leave it on for the recommended time and enjoy the pampering sensation.

Once you’ve removed the mask, it’s important to tone your skin. Use a natural toner like rose water or witch hazel to balance and refresh your complexion. Gently pat the toner onto your face using a cotton pad.
The final step is to moisturize your skin. Choose a moisturizer that suits your skin type, whether it’s a light lotion, rich cream, or facial oil. Massage the moisturizer into your skin using upward motions, focusing on areas that tend to be drier or more prone to fine lines.
Now that you have all the necessary tools and ingredients, you’re ready to embark on your DIY facial journey. Treat yourself to an organic facial treatment in the comfort of your own home, using natural facial ingredients and homemade face scrubs. Enjoy the rejuvenating experience and revel in the radiant and healthy glow of your skin afterwards.
How Can I Make Homemade Facial Scrubs?
If you don’t have an exfoliation scrub you like already, you can make your own. Some homemade facial scrubs you can whip up in your kitchen include:
- Honey and Oats Scrub: Mix together equal parts of honey and oats to create a gentle exfoliating scrub. Oats help to remove dead skin cells while honey moisturizes and soothes the skin.
- Tea Tree Oil and Sugar Scrub: Combine a few drops of tea tree oil with granulated sugar. The antibacterial properties of tea tree oil help to cleanse the skin, while the sugar acts as a natural exfoliant.
- Brown Sugar and Coconut Oil Scrub: Mix together brown sugar and coconut oil to create a nourishing and hydrating scrub. The brown sugar exfoliates the skin, while the coconut oil moisturizes and leaves a soft, smooth complexion.
These homemade face scrubs not only effectively remove dead skin cells and impurities from the skin but also utilize natural ingredients that are gentle and nourishing. They are easy to make and give your skin a healthy, radiant glow.

Why Homemade Face Scrubs?
“Using homemade face scrubs allows you to control the ingredients and tailor them to your skin’s specific needs. Plus, it’s a great way to avoid harsh chemicals and unnecessary additives found in some store-bought exfoliators. With just a few simple ingredients, you can create effective and budget-friendly scrubs right in your kitchen!”
| Benefits of Homemade Face Scrubs: | Store-Bought Exfoliators: |
|---|---|
|
|
By opting for homemade face scrubs, you have the freedom to choose natural and wholesome ingredients that are beneficial for your skin. The table below highlights the advantages of homemade face scrubs over store-bought exfoliators.
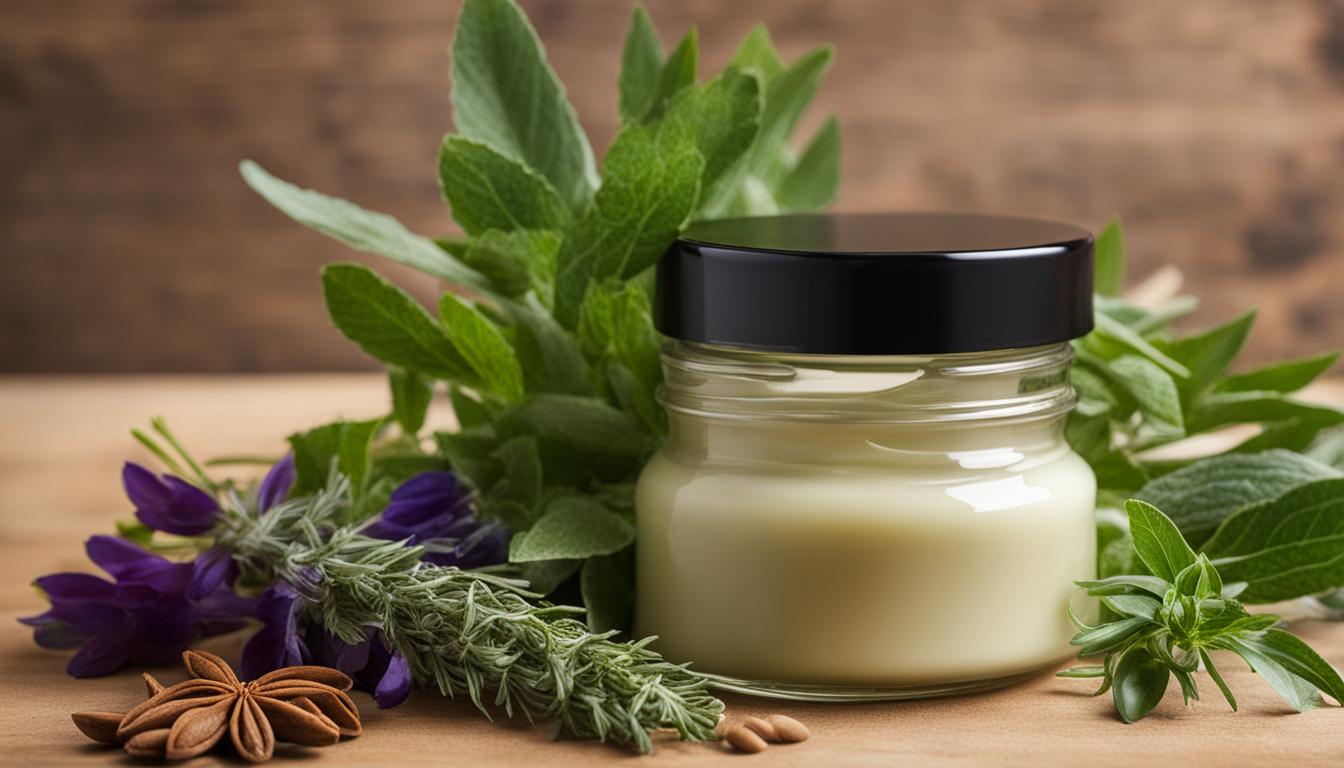
What Ingredients Can I Use for Homemade Face Masks?
When it comes to homemade face masks, the possibilities are endless. Depending on what ingredients you have on hand, you can create nourishing and rejuvenating masks to enhance your skincare routine. Here are some popular options:
- Milk and Honey: This classic combination is known for its moisturizing and soothing properties. It can help to hydrate and soften the skin, leaving it feeling refreshed and revitalized.
- Honey and Avocado: Avocado is rich in vitamins and antioxidants, making it an excellent choice for a homemade face mask. When combined with honey, this mask can nourish and hydrate the skin, giving it a healthy glow.
- Oats and Honey: Oats are not just a nutritious breakfast option, they also make a great ingredient for a face mask. When mixed with honey, oats can help to gently exfoliate the skin, removing dead skin cells and leaving it smooth and radiant.
- Yogurt and Strawberries: This fruity combination is packed with antioxidants and vitamins, which can help to brighten the skin and promote a youthful complexion. The natural acids in strawberries can also gently exfoliate the skin for a smoother texture.
- Tomato and Cucumber: If you’re looking to soothe and refresh your skin, a mask made with tomato and cucumber is a great choice. These ingredients can help to reduce redness and inflammation, leaving you with a calm and balanced complexion.
These homemade face masks offer a range of benefits and are a fantastic addition to your organic facial treatment routine. They are easy to make and use ingredients that are readily available in your kitchen. Give them a try and enjoy the nourishing and rejuvenating effects on your skin.
What Are the Steps to Perform a Facial at Home?
Performing a facial at home is a wonderful way to take care of your skin and pamper yourself. This natural skincare routine involves several steps that work together to deeply cleanse, nourish, and hydrate your skin, leaving it refreshed and rejuvenated.
The Basic Steps of a Home Facial:
- Cleansing: Start by cleansing your face with a gentle cleanser or a natural ingredient like honey and coconut oil. This step removes dirt, makeup, and excess oils, providing a clean canvas for the rest of the facial.
- Exfoliating: Gently exfoliate your skin to remove dead skin cells and reveal a fresh complexion. You can use homemade scrubs like sugar and tea tree oil or brown sugar and coconut oil for a gentle yet effective exfoliation.
- Steaming: Steaming is an essential step that helps to open up the pores and prepare the skin for better absorption of products. Boil water or tea, add essential oils if desired, and hold your face over the steam with a towel draped over your head.
- Extracting (optional): If needed, use sanitized extraction tools to gently remove blackheads or whiteheads. This step should be done with caution to avoid damaging the skin.
- Masking: Apply a facial mask using either a homemade blend or a store-bought product. Choose a mask that suits your skin type and targeted concerns. This will help nourish and treat the skin, giving it a boost of hydration.
- Toning: After removing the mask, tone your skin to close the pores and maintain the skin’s pH balance. You can use a homemade toner or a store-bought one, depending on your preference.
- Moisturizing: Finish your at-home facial by moisturizing your skin with your favorite moisturizer or a homemade blend using natural oils. This step locks in moisture and leaves your skin feeling soft and supple.
By following these facial steps at home, you can establish a natural skincare routine that promotes healthy, glowing skin. It’s important to customize the steps and products based on your specific skin type and concerns.

Remember, consistency is key when it comes to skincare. Set aside some time regularly to indulge in a relaxing and beneficial at-home facial. Your skin will thank you!
How Do I Cleanse and Exfoliate My Skin?
Cleansing and exfoliating are the initial steps in a facial. These steps are essential for maintaining a healthy, glowing complexion. Let’s explore how you can cleanse and exfoliate your skin at home using natural ingredients.
The Cleansing Process
Start by choosing a gentle cleanser that suits your skin type. Alternatively, you can opt for natural ingredients like honey and coconut oil for a soothing and effective cleanse. These ingredients help remove dirt, makeup, and excess oils from the skin, leaving it fresh and rejuvenated.
“Cleansing the skin is essential to remove impurities and prepare it for the rest of your facial routine.”
The Exfoliation Step
To achieve a radiant complexion, exfoliation plays a vital role. You can make a homemade scrub using ingredients readily available in your kitchen. Consider using a combination of sugar and tea tree oil or brown sugar and coconut oil. Gently massage the scrub onto your skin in circular motions, focusing on areas prone to dryness or congestion. This process helps slough off dead skin cells, revealing a fresh, glowing complexion.

Remember to be gentle when exfoliating as harsh scrubbing can irritate the skin. Exfoliation should be done once or twice a week, depending on your skin’s sensitivity.
Your Daily Skincare Routine
Incorporating these cleansing and exfoliating steps into your regular skincare routine can help maintain a healthy and radiant complexion. Cleanse your skin twice a day, morning and night, to remove impurities accumulated throughout the day and overnight. Exfoliate once or twice a week to promote cell turnover and keep your skin looking refreshed.
What Is the Proper Way to Steam and Mask?
Steaming is an important step in a facial as it helps to open up the pores and enhance the effectiveness of the mask. To steam your face at home, follow these simple steps:
- Fill a pot with water or prepare a cup of herbal tea.
- Boil the water or brew the tea.
- Transfer the hot water or tea to a heat-safe bowl.
- Add a few drops of essential oils like lavender or tea tree oil for a soothing or purifying effect (optional).
- Place a towel over your head, creating a tent-like structure to trap in the steam.
- Lean over the bowl and position your face at a comfortable distance, allowing the steam to gently envelop your skin.
- Steam your face for about 5-10 minutes, taking breaks if needed.
While steaming, be cautious of the heat to avoid burns. If you have sensitive skin, ensure the steam is not too hot or too close to your face.
After steaming, apply a facial mask to further nourish and pamper your skin. Masks can be made at home or purchased from stores. Here are a few examples of facial masks with natural ingredients:
| Mask Recipe | Benefits |
|---|---|
| Milk and Honey Mask | Moisturizes and soothes the skin |
| Honey and Avocado Mask | Nourishes and rejuvenates the skin |
| Oats and Honey Mask | Exfoliates and soothes sensitive skin |
| Yogurt and Strawberries Mask | Brightens and tightens the skin |
| Tomato and Cucumber Mask | Refreshes and balances oily skin |
Apply the mask evenly to your face, avoiding the delicate eye and lip areas. Leave it on for the recommended time as per the instructions or recipe. Then, rinse off with lukewarm water and pat your skin dry with a clean towel.
Remember to choose a mask that suits your skin type and addresses your specific skin concerns. Whether you opt for a homemade blend or a store-bought product, the mask will provide nourishment and hydration, leaving your skin refreshed and glowing.

How Do I Tone and Moisturize My Skin?
After completing the previous steps in your natural skincare routine, such as cleansing, exfoliating, steaming, and masking, it’s essential to finish off with toning and moisturizing. These final steps will help seal in the benefits of the facial and leave your skin feeling soft, supple, and rejuvenated.
Toning
Toning is a crucial step in any skincare routine as it helps to close the pores and restore the skin’s pH balance. After a facial, toning is especially important to ensure that no impurities or residue are left behind.
You can create your own homemade toner using natural ingredients or choose a toner product that suits your skin type. Here are a few options:
- Green tea toner: Brew a cup of green tea and allow it to cool. Apply the tea to your skin using a cotton pad to soothe and tighten the pores.
- Apple cider vinegar toner: Mix equal parts of apple cider vinegar and water. Apply this mixture to your face using a cotton pad to refine your skin’s texture and restore its natural balance.
- Rosewater toner: Spritz rosewater onto your skin to hydrate, refresh, and tone. Rosewater also has a natural fragrance that can uplift your mood.
Choose a toner that works best for your skin type and apply it gently using a cotton pad or by spritzing it onto your face. Avoid harsh rubbing or tugging on the skin.
Moisturizing
Moisturizing is the final step in your at-home organic facial treatment. It helps to hydrate and nourish the skin, leaving it feeling smooth and plump.
You can opt for a commercial moisturizer or create your own homemade blend using natural oils. Here are a few options:
- Jojoba oil: Known for its similarity to our skin’s natural oils, jojoba oil can deeply moisturize without clogging pores.
- Shea butter: A rich and creamy moisturizer, shea butter helps to lock in hydration and protect the skin’s barrier.
- Coconut oil: This versatile oil is deeply moisturizing and can leave your skin feeling soft and smooth.
Apply your chosen moisturizer or homemade blend to your face, gently massaging it in using upward strokes. Pay extra attention to any dry or dehydrated areas.
The combination of toning and moisturizing concludes your natural skincare routine, leaving your skin refreshed and nourished. Remember to perform this routine regularly and enjoy the benefits of radiant and healthy-looking skin.

What Are the Benefits of Doing a Facial at Home?
Doing a facial at home offers a range of benefits that contribute to your natural skincare routine and organic facial treatment. Let’s explore the advantages:
- Cost-effective: By utilizing simple, everyday ingredients found in your kitchen, you can save money on expensive spa treatments. Natural ingredients are often affordable and readily available.
- Time-saving: With a busy schedule, finding time for a spa appointment can be challenging. Performing a facial at home allows you to allocate your own time, fitting it seamlessly into your routine.
- Customization: Your skin has unique needs and concerns. When doing a facial at home, you have the freedom to customize each step to address specific issues, providing tailored care for your skin type.
- Relaxation and well-being: Engaging in a facial at home can be a soothing and rejuvenating self-care activity. The process allows you to unwind, destress, and enjoy a sense of well-being while enhancing your natural beauty.
By harnessing the power of natural ingredients and engaging in a regular facial routine, you can maintain healthy, glowing skin in the comfort of your own home.
Testimonial
“I absolutely love doing facials at home. It’s not only a cost-effective way to care for my skin, but it’s also incredibly relaxing. I can customize the ingredients and take my time to truly pamper myself. My skin has never looked better since I started incorporating regular at-home facials into my skincare routine!”
| Benefit | Description |
|---|---|
| Cost-effective | Save money by using everyday ingredients |
| Time-saving | Create your own schedule |
| Customization | Address specific skin concerns |
| Relaxation and well-being | Enjoy a soothing self-care activity |

Conclusion
By following the steps and utilizing natural ingredients, you can transform your home into a spa-like sanctuary and enjoy a rejuvenating facial experience. Incorporating a natural skincare routine into your self-care regimen provides numerous benefits for your skin and overall well-being.
Start with cleansing, exfoliating, and steaming to purge impurities and unclog pores. Then, apply a homemade mask tailored to your skin type for nourishment and hydration. Complete the process by toning and moisturizing to seal in the benefits and leave your skin looking radiant and healthy.
Embracing an organic facial treatment at home not only allows you to take control of your skincare routine but also saves time and money. With readily available natural ingredients, you can achieve flawless skin and enjoy the spa experience without leaving your house. Indulge in the luxury of self-care and pamper yourself with a DIY facial using the power of natural ingredients.
FAQ
What can I use for a facial at home?
For a facial at home, you can use everyday ingredients like cleanser, exfoliating scrub, water or tea for steaming, essential oils (optional), sanitized extraction tools, facial mask product or blend, liquid for toning, and moisturizer.
How can I make homemade facial scrubs?
You can make homemade facial scrubs using natural ingredients like honey and oats, tea tree oil and sugar, or brown sugar and coconut oil.
What ingredients can I use for homemade face masks?
You can use a variety of ingredients for homemade face masks, such as milk and honey, honey and avocado, oats and honey, yogurt and strawberries, or tomato and cucumber.
What are the steps to perform a facial at home?
The steps to perform a facial at home include cleansing, exfoliating, steaming, extracting (optional), masking, toning, and moisturizing.
How do I cleanse and exfoliate my skin?
To cleanse and exfoliate your skin, use a gentle cleanser or natural ingredients like honey and coconut oil. Exfoliate with homemade scrubs like sugar and tea tree oil or brown sugar and coconut oil.
What is the proper way to steam and mask?
To steam your face, boil water or tea, add essential oils if desired, and hold your face over the steam with a towel draped over your head. Apply masks using homemade blends or store-bought products targeting specific skin concerns.
How do I tone and moisturize my skin?
After a facial, close the pores by using a homemade toner or a product of your choice. Moisturize your skin with your favorite moisturizer or a homemade blend using natural oils.
What are the benefits of doing a facial at home?
Doing a facial at home allows you to save money and time, customize your skincare routine, and address specific skin concerns. It can also be a relaxing and enjoyable self-care activity.