Making soap at home is an enjoyable and cost-effective way to create your own natural skincare products. By using natural ingredients, you can ensure that your soap is free from harsh chemicals and additives. In this guide, I will take you through the process of making soap at home with natural ingredients, including the best recipes and techniques to achieve the desired results.
Key Takeaways:
- Creating homemade soap allows you to have full control over the ingredients and know exactly what you’re putting on your skin.
- Using natural additives like essential oils, colorants, exfoliants, and botanicals can enhance the scent, texture, and appearance of your homemade soap.
- Choosing the right oils and butters is crucial in soap making, as they determine the properties and characteristics of your soap.
- Adding fragrance to your soap can create a pleasing and aromatic experience, with essential oils being a popular choice.
- Experimenting with natural colorants can add visual appeal to your soap, giving it a beautiful hue without using artificial dyes.
Understanding Natural Soap Additives
When making soap at home, it’s important to understand the role of natural additives. These additives can enhance the scent, texture, and color of your soap. By incorporating the right ingredients, you can create unique and effective homemade soap recipes that cater to your personal preferences and skincare needs.
Fragrance with Essential Oils
Essential oils are a popular choice for adding fragrance to homemade soap. Derived from natural plant sources, they offer a wide range of captivating scents. Whether you prefer the calming aroma of lavender, the refreshing scent of citrus, or the invigorating fragrance of peppermint, essential oils can elevate the sensory experience of using your soap. Remember to follow recommended usage rates to achieve a balanced and pleasant scent.
Color with Natural Colorants
Giving your homemade soap a beautiful hue is easily achievable with natural colorants. Clays, botanicals, and even fruits and vegetables can be used to add vibrant colors. From the earthy tones of French pink clay to the golden glow of turmeric and the oceanic blue of spirulina, these natural colorants offer endless possibilities for creative soap making.
Texture with Exfoliants
Exfoliants can add both texture and exfoliating properties to your homemade soap. Incorporating ingredients such as oats, coffee grounds, or poppy seeds can create a gentle scrubbing effect, leaving your skin feeling refreshed and renewed.
Moisturize with Oils and Butters
The right combination of oils and butters can provide excellent moisturizing benefits in your homemade soap. Olive oil, coconut oil, shea butter, and cocoa butter are popular choices for their nourishing properties. These natural ingredients help to keep your skin hydrated and supple, contributing to a luxurious bathing experience.
By understanding and utilizing these natural soap additives, you can elevate your soap making skills and create high-quality, personalized bars of soap that offer a delightful blend of fragrance, color, texture, and moisturization.
Continue reading this homemade soap guide to learn more about choosing the right oils and butters for soap making.

Choosing the Right Oils and Butters
Making homemade soap involves carefully selecting oils and butters that contribute to the desired properties of your soap. The type of oil or butter you choose can impact the hardness, lather, and moisturizing capabilities of your soap. It’s essential to choose high-quality, organic oils and butters to ensure the best results in your homemade soap recipes.
Here are some popular oils and butters used in soap making:
- Olive Oil: Known for its mildness and moisturizing properties, olive oil creates a rich, creamy lather in soap.
- Coconut Oil: Coconut oil adds hardness and cleansing properties to soap, producing a bubbly lather.
- Shea Butter: With its nourishing and moisturizing qualities, shea butter helps in creating a creamy and luxurious bar of soap.
- Cocoa Butter: Cocoa butter adds firmness to soap and provides excellent moisturizing benefits.
When choosing oils and butters for your soap, consider the specific characteristics you want your soap to have. Experimenting with different combinations can result in unique homemade soap recipes tailored to your preferences.
| Oil/Butter | Properties | Benefits |
|---|---|---|
| Olive Oil | Mild, moisturizing | Creates a creamy lather |
| Coconut Oil | Hardening, cleansing | Produces a bubbly lather |
| Shea Butter | Nourishing, moisturizing | Offers a creamy and luxurious feel |
| Cocoa Butter | Firming, moisturizing | Provides excellent skin hydration |

Choosing the right oils and butters is like selecting the perfect ingredients for a recipe. Each oil and butter brings its own unique properties and benefits to your soap. By carefully considering your options and experimenting with different combinations, you can create homemade soap recipes that cater to your individual needs and preferences.
Adding Fragrance to Your Soap
Adding fragrance to your soap can elevate the sensory experience of using it. Essential oils are popular choices for adding fragrance as they are derived from natural plant sources and offer a wide range of scents.
“The right fragrance can turn a simple shower into a spa-like experience.”
Lavender, citrus, and peppermint are some common essential oil choices for soap making. Lavender essential oil provides a calming and floral scent, perfect for relaxation. Citrus essential oils, such as lemon or orange, bring a refreshing and energizing aroma to your soap. Peppermint essential oil offers a cool and invigorating scent that awakens the senses.
It’s important to follow recommended usage rates when adding essential oils to ensure a balanced and pleasant scent in your homemade soap. Too much essential oil can result in overpowering fragrances, while too little might make the scent barely noticeable. Each essential oil has its own guidelines, so be sure to consult a reliable source or recipe for proper measurements.
To add fragrance to your soap, simply incorporate the essential oils into your soap mixture during the soap making process. Allow the oils to disperse evenly throughout the soap batter to ensure a consistent fragrance in each bar.

Tips for experimenting with soap fragrances:
- Combine different essential oils to create unique scent blends.
- Test the scent of your soap after it has cured to ensure it meets your expectations.
- Consider the purpose of your soap and choose essential oils that align with its intended use. For example, use lavender essential oil in a calming soap for bedtime routines.
The addition of fragrance adds another dimension to your homemade soap, making it not only cleansing but also a delightful experience for the senses. Experiment with different scents and find the perfect fragrance combination that suits your preferences and personal style.
Enhancing the Color of Your Soap
When it comes to homemade soap, the color can be just as important as the scent and texture. Natural colorants are a great way to add a beautiful hue to your soap while keeping it free from synthetic dyes and additives. By using clays, botanicals, and even fruits and vegetables, you can create a range of stunning colors that are both visually appealing and skin-friendly.
In natural soap making, there are various options for achieving vibrant and natural colors. For instance, French pink clay is known for its soft and feminine hues, perfect for creating lovely pastel soaps. Turmeric, on the other hand, can give your soap a warm and vibrant yellow tone, adding a touch of brightness to your bath time routine. If you’re looking for a vibrant blue-green shade, spirulina is an excellent choice, derived from nutrient-rich algae.
| Natural Colorant | Color | Benefits |
|---|---|---|
| French Pink Clay | Pale pink | Produces a silky texture and gentle cleansing properties |
| Turmeric | Golden Yellow | Offers antioxidant and anti-inflammatory properties for the skin |
| Spirulina | Blue-Green | Rich in vitamins and minerals, providing nourishment to the skin |
To achieve your desired shade, it’s important to experiment with small amounts of colorants. Start by adding a pinch or two to your soap mixture, then gradually increase the amount until you achieve the color you desire. Remember, a little goes a long way, and it’s easier to add more colorant than to remove excess.
By incorporating natural colorants into your homemade soap recipes, you can create visually stunning bars that are not only gentle on the skin but also a pleasure to look at. Experiment with different combinations and techniques to unleash your creativity and produce unique soap creations that will delight your senses.
Adding Texture with Exfoliants
Incorporating exfoliants into your homemade soap can elevate its texture and provide gentle scrubbing properties. Exfoliants such as oats, coffee grounds, and poppy seeds add a delightful sensory experience to your soap while helping to remove dead skin cells and promote circulation.
When choosing exfoliants for your soap, it’s important to consider the size and texture of the particles. Fine-ground oats can provide a mild exfoliating effect, making them suitable for sensitive skin. Coffee grounds, on the other hand, offer a coarser texture and are excellent for removing dirt and oil from the skin. Poppy seeds add a gentle scrubbing action, leaving your skin feeling soft and smooth.
Here’s a simple recipe to incorporate exfoliants into your soap:
- Prepare your soap base following the soap making process.
- Once the base reaches a light trace, add your desired exfoliant.
- Stir the mixture well to ensure even distribution of the exfoliant throughout the soap.
- Pour the soap into your desired molds and let it cure according to the soap making process.
- Once cured, your exfoliating soap is ready to use and enjoy!

By adding exfoliants to your homemade soap recipes, you can create a luxurious spa-like experience in the comfort of your own home. Remember to adjust the amount of exfoliant used based on your personal preferences and the desired level of exfoliation. Whether you choose oats, coffee grounds, or poppy seeds, your exfoliating soap will leave your skin feeling refreshed and rejuvenated.
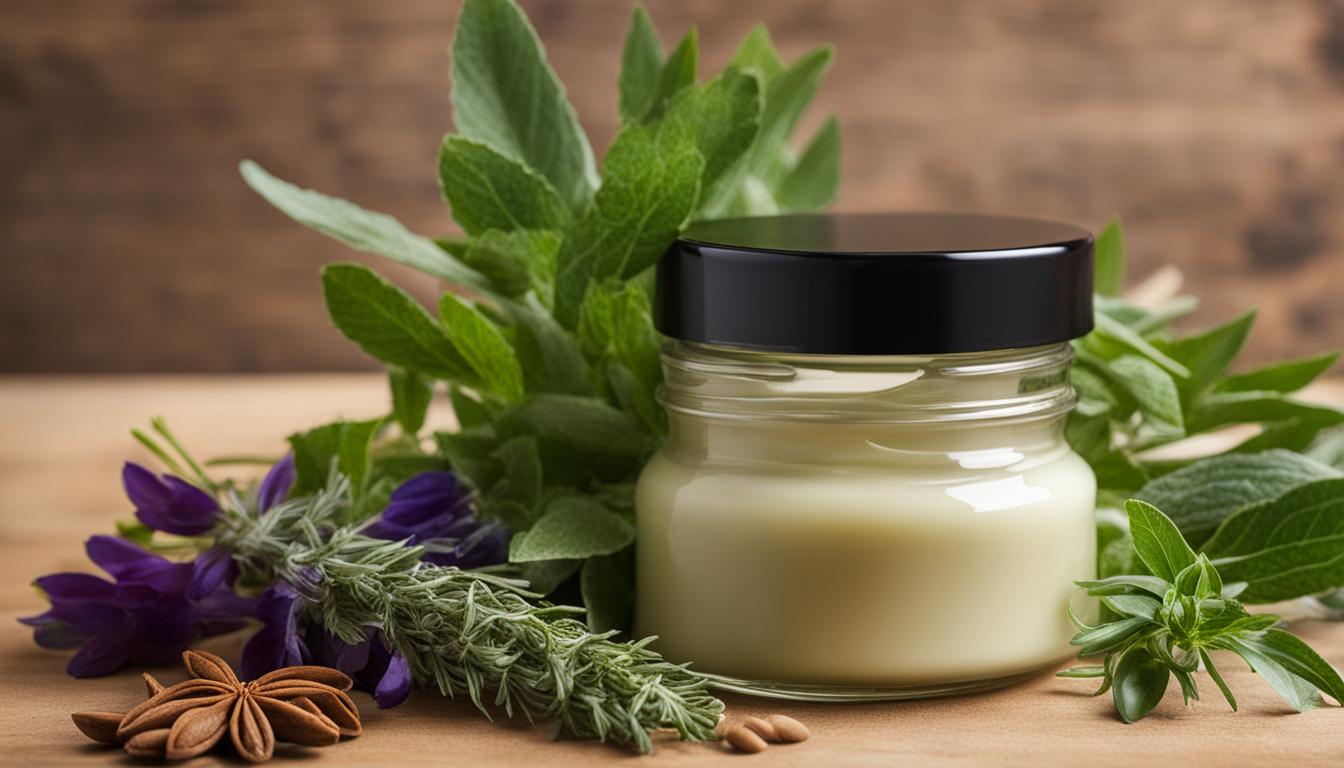
Decorating Your Soap with Botanicals
Adding a touch of nature to your handmade soap can elevate its visual appeal and create a unique sensory experience. Botanicals such as dried flowers, herbs, and seeds can be used to decorate your soap, adding a touch of natural beauty.
You can incorporate botanicals in various ways when decorating your soap. One option is to sprinkle dried flowers, herbs, or seeds on top of the soap, creating a visually stunning design. Alternatively, you can mix these botanicals into the soap mixture itself, distributing them evenly throughout the bar for a more integrated look.
However, it’s important to use botanicals sparingly to avoid potential issues. While they can enhance the aesthetics of your soap, excessive use of botanicals can lead to drain clogging or skin irritation. Remember, a little goes a long way when it comes to botanical decorations.
When selecting botanicals for your soap, opt for those that are suitable for cosmetic use and free of pesticides or harmful chemicals. You can find a wide variety of dried flowers, herbs, and seeds specifically curated for soap making supplies. These botanicals not only add visual interest but can also infuse your soap with delicate scents and beneficial properties.
It’s recommended to experiment with different combinations of botanicals to create beautiful designs or explore the use of single botanicals to achieve a minimalistic yet elegant look. The possibilities are endless, allowing you to tailor your soap decorations to your personal style and preferences.

Creating Hard Bars of Soap
Hardness is a critical characteristic of soap that determines the longevity and durability of the bars. To create hard bars of soap that last longer, there are a few techniques you can use in the soap making process.
Adding Salt
One method to increase the hardness of your soap is by adding salt to the recipe. Salt bars, which contain a significant amount of salt, have a unique texture and lather. The salt helps to create a firm and long-lasting bar of soap.
“Salt bars are a fantastic way to create hard bars of soap. The addition of salt not only increases the bar’s hardness but also gives it a luxurious feel and an excellent exfoliating experience.”
Using Oils and Butters with High Stearic Acid Content
Another way to enhance the hardness of your soap is by using oils and butters with high stearic acid content. Stearic acid is a fatty acid found in many natural ingredients, including palm oil and cocoa butter. These oils and butters contribute to the hardness of the soap and produce a stable and long-lasting bar.
| Oils and Butters | Stearic Acid Content (%) |
|---|---|
| Palm Oil | 39-55% |
| Cocoa Butter | 34-37% |
| Shea Butter | 5-15% |

By incorporating these oils and butters into your handmade soap recipes, you can create bars that are firm, long-lasting, and provide excellent cleansing properties.
To summarize, creating hard bars of soap involves adding salt to the recipe and selecting oils and butters with high stearic acid content. By implementing these techniques, you can ensure your soap bars maintain their shape and durability, providing a satisfying and long-lasting experience for your customers.
Safety Precautions in Soap Making
When it comes to soap making, ensuring safety is paramount. The use of lye, a necessary ingredient in soap making, requires careful handling to prevent any potential accidents or injuries. Here are some essential safety precautions to follow when making soap at home:
- Wear Safety Gear: Protect your eyes with safety goggles, and cover your hands with gloves to shield them from direct contact with lye and other ingredients.
- Use Protective Clothing: It’s important to wear appropriate clothing, such as long sleeves and pants, to minimize skin exposure and reduce the risk of burns.
- Work in a Well-Ventilated Area: Soap making involves the release of fumes, so work in a well-ventilated space or use a fume hood to ensure proper air circulation during the process.
- Use Heatproof Containers and Tools: When handling lye or working with hot liquids, ensure you use heatproof containers and tools to prevent accidents and protect yourself from burns.
“Remember, safety should always be the priority when making soap at home. By following these precautions, you can enjoy the soap making process while minimizing any potential risks.” – Emily Smith, Soap Making Expert
By taking these safety precautions, you can create your homemade soap confidently and efficiently, without compromising your well-being or the quality of the final product.
Safety Precautions in Soap Making – Summary
| Safety Precautions | Key Points |
|---|---|
| Wear Safety Gear | Protect your eyes with safety goggles and wear gloves to shield your hands from lye and other ingredients. |
| Use Protective Clothing | Wear long sleeves and pants to minimize skin exposure and reduce the risk of burns. |
| Work in a Well-Ventilated Area | Ensure proper air circulation by working in a well-ventilated space or using a fume hood. |
| Use Heatproof Containers and Tools | Use containers and tools that can withstand heat to prevent accidents and burns. |

Curing and Storing Your Homemade Soap
After making your soap, it’s crucial to properly cure and store it to ensure the best quality. Curing allows the excess moisture in the soap to evaporate, resulting in harder and longer-lasting bars. This step is essential to achieve the perfect texture and performance of your handmade soap.
To begin the curing process, place the freshly made soap on a rack in a cool, dry place. This allows air to circulate around the soap, aiding in the evaporation of moisture. It’s advisable to let the soap cure for at least four weeks before using it. During this time, the soap will continue to harden and become milder, making it more gentle on the skin.
Once your soap has completed the curing period, it’s important to store it properly to maintain its quality. Find a well-ventilated area, away from heat and humidity, to keep your soap. Avoid storing it in a bathroom or near windows where it may be exposed to excess moisture or heat. By storing your cured soap correctly, you can extend its shelf life and ensure it remains in excellent condition.
FAQ
What are some common natural additives used in homemade soap recipes?
Some common natural additives used in homemade soap recipes include essential oils for fragrance, natural colorants like clays and botanicals, exfoliants for texture, and moisturizing ingredients like oils and butters.
What oils and butters are commonly used in homemade soap recipes?
Olive oil, coconut oil, shea butter, and cocoa butter are some popular oils and butters used in homemade soap recipes.
How can I add fragrance to my homemade soap?
Essential oils, derived from natural plant sources, are popular choices for adding fragrance to homemade soap. Lavender, citrus, and peppermint are some common essential oil choices for soap making.
What can I use to naturally color my homemade soap?
Clays, botanicals, and even fruits and vegetables can be used as natural colorants for homemade soap. French pink clay, turmeric, and spirulina are some common choices.
How can I add texture and exfoliating properties to my homemade soap?
Oats, coffee grounds, and poppy seeds are some natural exfoliants that can be used in soap making to add texture and scrubbing properties to the soap.
How can I decorate my homemade soap with botanicals?
Dried flowers, herbs, and seeds can be sprinkled on top of the soap or incorporated throughout the bar for a decorative touch.
How can I create hard bars of soap?
Adding salt to your soap can create harder bars, and using oils and butters with high stearic acid content, like palm oil or cocoa butter, can also contribute to the hardness of the soap.
What safety precautions should I follow when making soap at home?
Safety goggles, gloves, and protective clothing should be worn when handling caustic lye, a necessary ingredient in soap making. Working in a well-ventilated area and using heatproof containers and tools are also important safety measures.
How should I cure and store my homemade soap?
After making your soap, place it on a rack in a cool, dry place to cure for at least four weeks before using. Store the cured soap in a well-ventilated area, away from heat and humidity, to maintain its quality.