Making your own shea butter at home is a simple and cost-effective way to provide all-natural nourishment for your skin. In this step-by-step guide, I’ll walk you through the process of making shea butter using two different recipes: one with coconut oil and one without. These recipes only require a few simple ingredients and can be easily customized with your choice of essential oils for a personalized scent.
If you’re interested in learning how to make shea butter from scratch, this guide is for you. Whether you’re a skincare enthusiast or simply looking for a fun DIY project, this homemade shea butter will leave your skin feeling soft, moisturized, and healthy.
Key Takeaways:
- Learn how to make shea butter using simple recipes.
- Customize your shea butter with essential oils for a personalized scent.
- Save money by making your own shea butter at home.
- Enjoy the natural nourishment and benefits of homemade shea butter.
- Support sustainable shea butter production.
Now, let’s dive into the world of shea butter and discover the joy of creating your own skincare products.
Why Make Your Own Shea Butter?
Making your own shea butter provides numerous benefits, allowing you to have complete control over the ingredients, ensuring a product that is free from fillers and additives. This homemade alternative is not only cost-effective but also offers superior nourishment for your skin compared to commercial creams. By embracing the art of shea butter production in the comfort of your own home, you can support local suppliers and promote sustainable shea butter production.

Whether you have sensitive skin or simply prefer a more natural approach to skincare, homemade shea butter is an excellent choice. Unlike store-bought alternatives, which often contain additional ingredients and preservatives, homemade shea butter ensures that your skin receives only the purest, most beneficial nutrients. By taking the production process into your own hands, you can be confident in the quality of the ingredients you use and the resulting product you apply to your skin.
“Making your own shea butter allows you to have complete control over the ingredients you use and ensures a product that is free from fillers and additives.”
In addition to its skincare benefits, making your own shea butter also empowers you to support local suppliers and promote sustainability. Shea butter is derived from the shea nut, which primarily grows in West African countries. By sourcing your shea butter locally, you contribute to the economic development of these communities and encourage sustainable practices in shea butter production.
Moreover, by making your own shea butter, you reduce your environmental impact. Commercial creams often come in plastic containers and contribute to plastic waste pollution. In contrast, creating your own shea butter allows you to use reusable glass containers, minimizing plastic consumption and promoting eco-friendly skincare choices.
So why settle for mass-produced creams when you can create your own homemade shea butter? Experience the numerous benefits of this natural skincare treasure by embarking on your shea butter production journey in the following sections.
Ingredients and Supplies Needed
To make shea butter, you will need a few key ingredients and supplies. Here’s a list of everything you’ll need:
- Unrefined Shea Butter: The main ingredient in shea butter is, well, shea butter! You can purchase high-quality, unrefined shea butter from reputable suppliers who specialize in natural skincare products. Look for suppliers that prioritize sustainability and fair trade practices to support ethical sourcing.
- Extra Virgin Olive Oil: Olive oil is a common ingredient used in shea butter recipes as it helps to soften and moisturize the skin.
- Coconut Oil (optional): If you prefer a scent reminiscent of the tropics, you can add coconut oil to your shea butter recipe. It not only adds a delightful aroma but also provides additional nourishment for your skin.
- Vitamin E Oil: Vitamin E oil is a powerful antioxidant that helps to extend the shelf life of your shea butter and provides added benefits for your skin.
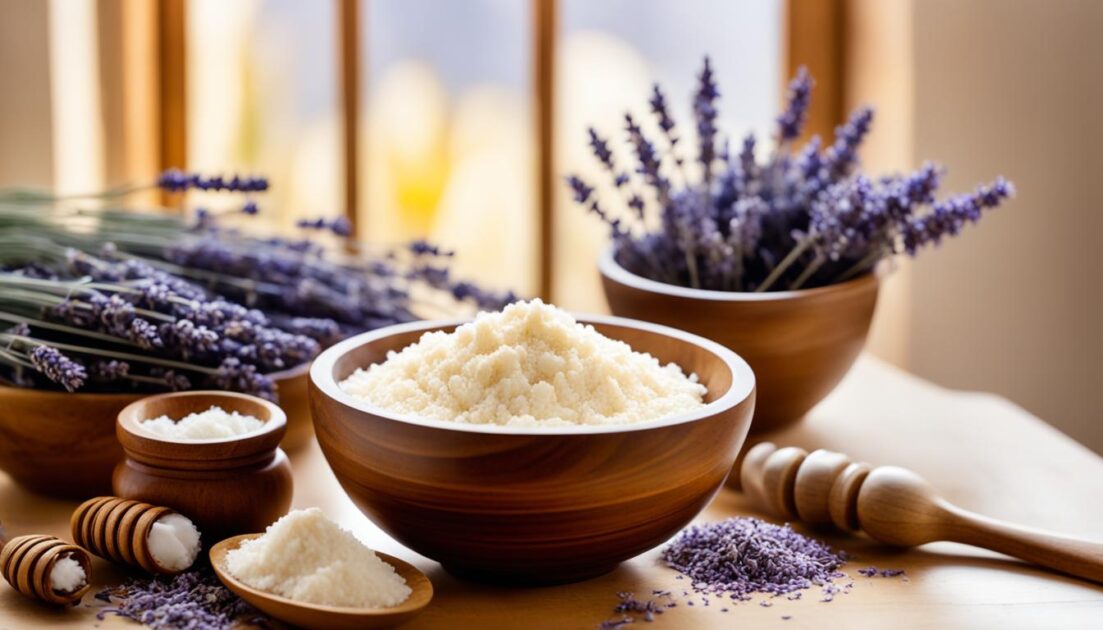
- Essential Oils: To customize the scent of your shea butter, you can add a few drops of your favorite essential oils. Lavender, chamomile, and citrus oils are popular choices, but feel free to get creative and experiment with different combinations.
- Kitchen Tools: In terms of supplies, you’ll need basic kitchen tools such as a fork for mashing, an electric mixer for whipping, and glass containers for storing the final product.
Now that you have a list of the ingredients and supplies needed, let’s move on to the next section where I’ll share a recipe for whipped shea butter.

Recipe 1: Whipped Shea Butter
Creating your own whipped shea butter is an excellent way to indulge in a luxurious and nourishing skincare product. By following this simple recipe, you’ll be able to enjoy the benefits of homemade shea butter that can be customized to suit your preferences.
Here’s what you’ll need:
- 1 cup of raw shea butter
- 2 tablespoons of olive oil
- 1 teaspoon of vitamin E oil
- 5-10 drops of your favorite essential oils (optional)
Now, let’s get started:
- Using a fork, mash the raw shea butter in a bowl until it becomes smooth and creamy.
- Add the olive oil, vitamin E oil, and essential oils to the mashed shea butter.
- Using an electric mixer, beat the mixture on high speed for approximately 5 minutes, or until it becomes light and fluffy.
- Spoon the whipped shea butter into a clean glass container with a lid to preserve its freshness.
You can use this whipped shea butter as a moisturizer for your skin, providing it with intense hydration and nourishment. The natural ingredients in shea butter help to improve skin elasticity and leave it feeling soft and supple.
Remember, homemade whipped shea butter is free from harmful chemicals and additives commonly found in commercial skincare products. Enjoy the satisfaction of creating a personalized skincare product that is both luxurious and beneficial for your skin.
| Ingredients | Benefits |
|---|---|
| Raw Shea Butter | Deeply moisturizes and nourishes the skin |
| Olive Oil | Softens and smooths the skin |
| Vitamin E Oil | Provides antioxidant properties and helps protect the skin from damage |
| Essential Oils | Adds a delightful scent and offers additional skincare benefits |
Recipe 2: Whipped Shea Butter with Coconut Oil
If you prefer a shea butter recipe with a coconut oil scent, this recipe is for you. Start by mashing the raw shea butter with a fork, then add the coconut oil and mash together. Next, add the vitamin E oil and use an electric mixer to beat the mixture on high for 5 minutes. The resulting whipped shea butter with coconut oil will be creamy and moisturizing. Store it in a glass container with a lid.
| Ingredients | Supplies |
|---|---|
|
|
Note: The quantities mentioned above can be adjusted according to your desired consistency and scent preferences.
Start by mashing the raw shea butter with a fork until it becomes smooth. Then, add the coconut oil and continue mashing until the two ingredients are well combined. Next, add the vitamin E oil to the mixture for its added skin-nourishing benefits. Using an electric mixer, beat the mixture on high speed for 5 minutes. This will incorporate air into the mixture and give it a light, whipped texture.
Once the mixture has been whipped to your desired consistency, transfer it to a glass container with a lid. The whipped shea butter with coconut oil can be stored at room temperature or in the refrigerator, depending on your preference. Make sure to label the container with the date of preparation to keep track of its freshness.
When using your homemade whipped shea butter with coconut oil, simply scoop out a small amount and warm it between your hands before applying it to your skin. This luxurious and moisturizing blend will leave your skin feeling soft, nourished, and delicately scented with the natural aroma of coconut oil.
Tips for Customizing Your Shea Butter
One of the great things about making your own shea butter is that you can easily customize it to suit your preferences. Whether you want to create a unique scent or adjust the consistency, there are endless possibilities for customizing your homemade shea butter.
Add Essential Oils for a Personalized Scent
If you’re a fan of aromatherapy or simply love a specific fragrance, adding essential oils to your shea butter is a fantastic way to customize the scent. Experiment with different oils such as lavender, rose, or citrus to create a blend that suits your taste. The soothing aroma will elevate your skincare routine and provide an indulgent experience.
Adjust the Amount of Oil for Consistency Control
The amount of oil you use when making shea butter determines its consistency. If you prefer a lighter and creamier texture, you can reduce the amount of oil in the recipe. Conversely, if you want a thicker and more luxurious butter, increase the oil quantity. Play around with the proportions until you achieve the desired consistency that feels perfect for your skin.
Explore Different Uses for Shea Butter
Shea butter is a versatile ingredient with a wide range of uses. Here are some ideas to get you started:
- Moisturizer: Apply shea butter to your skin to provide deep hydration, especially on dry areas like elbows, knees, and heels.
- Hair Mask: Massage shea butter into your hair and scalp for a nourishing treatment that promotes softness and shine.
- Lip Balm: Formulate a lip balm by melting shea butter with a few drops of essential oil for smooth and moisturized lips.
- Stretch Marks Prevention: Regularly apply shea butter to areas prone to stretch marks, such as the belly and thighs, to help prevent their formation.
- Cuticle Treatment: Rub a small amount of shea butter on your cuticles to moisturize and nourish them.
Remember, these are just a few examples of how you can use shea butter. Feel free to get creative and explore other uses based on your personal skincare and wellness needs.

Now that you have some tips for customizing your shea butter, it’s time to get creative and enjoy the benefits of your personalized skincare creation.
| Benefit | How to Use |
|---|---|
| Moisturizer | Apply a small amount of shea butter to clean, dry skin and gently massage until absorbed. |
| Hair Mask | Melt shea butter and apply it to damp hair, focusing on the lengths and ends. Leave it on for 30 minutes to an hour, then rinse thoroughly. |
| Lip Balm | Mix melted shea butter with a few drops of your preferred essential oil. Pour the mixture into a small container and allow it to solidify. Apply to lips as needed. |
| Stretch Marks Prevention | Gently massage shea butter onto areas prone to stretch marks, such as the belly, hips, and thighs, at least once a day. |
| Cuticle Treatment | Apply a small amount of shea butter to your cuticles and massage in a circular motion until absorbed. Repeat as necessary. |
Storing and Using Your Homemade Shea Butter
To ensure the longevity of your homemade shea butter, it is important to store it properly. Find a cool, dry place away from direct sunlight to keep your shea butter fresh and in its best condition.
Glass containers with airtight lids are ideal for storing homemade shea butter. Not only do they help preserve the freshness and quality of the butter, but they also prevent any unwanted odors or contaminants from affecting it.
When it comes to using your homemade shea butter, the process is simple. Take a small amount of the butter and gently warm it between your hands. This will soften the butter and make it easier to apply to your skin.
Massage the shea butter into your skin using gentle circular motions. Allow it to absorb for a few minutes before continuing with your regular skincare routine. Enjoy the nourishing and moisturizing benefits of your homemade shea butter, and relish in the knowledge that you created this natural skincare product yourself.
FAQ
How do I make shea butter at home?
Making shea butter at home is simple. Mash raw shea butter with a fork, then add oils and mix until smooth. For more detailed instructions, refer to the step-by-step guide in this article.
Why should I make my own shea butter?
Making your own shea butter allows you to control the ingredients used and ensure that you are using a product free from fillers and additives. It is also a cost-effective way to nourish your skin and support local suppliers.
What ingredients and supplies do I need to make shea butter?
You will need unrefined shea butter, extra virgin olive oil, vitamin E oil, essential oils (optional), a fork, electric mixer, and glass containers for storing.
How do I make whipped shea butter?
Mash raw shea butter with a fork until smooth. Add olive oil, vitamin E oil, and essential oils (optional). Use an electric mixer to beat the mixture on high for 5 minutes until light and fluffy. Store in a glass container.
Can I make shea butter with coconut oil?
Yes, you can make whipped shea butter with coconut oil. Mash raw shea butter with a fork, then add coconut oil and mash together. Beat the mixture with an electric mixer for 5 minutes. Store in a glass container.
How can I customize my shea butter?
You can customize your shea butter by using different essential oils to create unique scents. You can also adjust the amount of oil used to achieve the desired consistency.
How should I store and use my homemade shea butter?
Store your homemade shea butter in a cool, dry place away from direct sunlight. Use a small amount, warm it between your hands, and apply it to your skin.


