Making your own natural lip balm at home is easy and allows you to control the ingredients that go into it. By using simple, natural ingredients like coconut oil, beeswax, shea butter, and essential oils, you can create a nourishing lip balm that will keep your lips soft and healthy. In this article, I will provide a step-by-step lip balm tutorial and share a DIY lip balm recipe using natural ingredients.
Key Takeaways:
- By making your own lip balm, you can avoid harmful chemicals found in store-bought options.
- Natural ingredients like coconut oil, beeswax, and shea butter provide nourishment, hydration, and protection to your lips.
- Essential oils can be added for a pleasant scent and additional benefits.
- Follow the provided DIY lip balm recipe and customize it to suit your preferences.
- Store your homemade lip balm in a cool place and use it within a year for the best quality.
Benefits of Homemade Lip Balm
When it comes to lip care, homemade lip balm offers numerous advantages over store-bought options. By creating your own lip balm at home, you have the opportunity to avoid harmful chemicals and additives that are often found in commercial products. This means you can give your lips the TLC they deserve without exposing them to potentially irritating or damaging ingredients.
One of the major benefits of making your own lip balm is the ability to customize the ingredients according to your preferences and specific lip care needs. Using natural ingredients such as coconut oil, beeswax, and shea butter, you can provide nourishment, hydration, and protection to your lips in a safe and effective way. These ingredients are known for their moisturizing properties, helping to keep your lips soft, supple, and kissable.
By opting for a homemade lip balm, you are not only taking control of what goes into the product but also ensuring that you are using natural and high-quality ingredients. Many commercial lip balms contain artificial fragrances, preservatives, and other synthetic additives that can strip moisture from your lips and irritate the delicate skin. With a homemade lip balm, you can skip the unnecessary fillers and focus on providing pure and gentle care to your lips.
Additionally, making your own lip balm can be a cost-effective choice. The ingredients required for homemade lip balm recipes are often readily available and affordable. By investing a little time and effort, you can create a batch of lip balm that will last for a long time, saving you money in the long run while ensuring you always have a trusty lip care companion at hand.
By using natural ingredients and customizing your lip balm recipe, you can enjoy all the wonderful benefits of homemade lip care without compromising on quality or breaking the bank. Treat your lips to the nurturing goodness they deserve with a homemade lip balm created just for you.
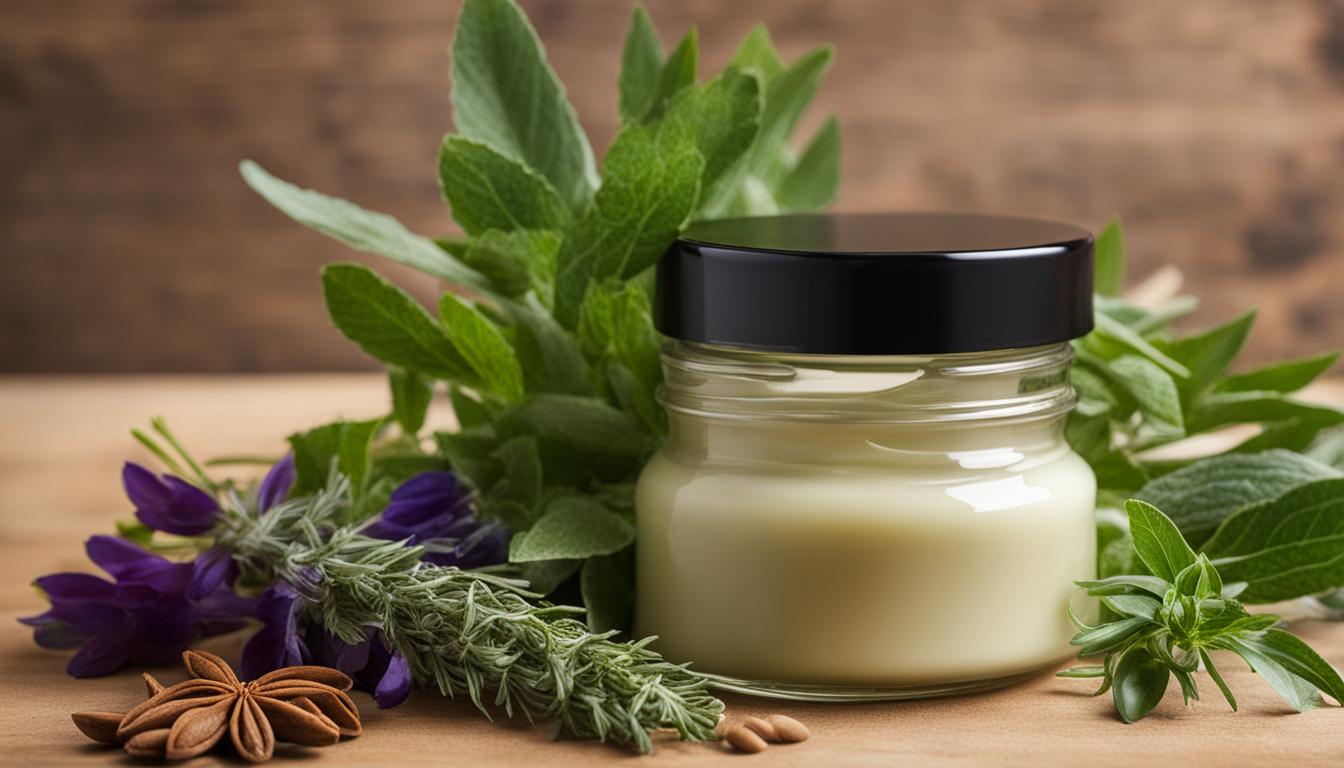
Essential Ingredients for Homemade Lip Balm
Making your own lip balm at home is a great way to ensure that you’re using natural and nourishing ingredients on your lips. Here are the essential ingredients you’ll need to create your DIY lip balm:
| Ingredient | Description |
|---|---|
| Coconut Oil | A solid at room temperature, coconut oil provides excellent moisturizing properties, keeping your lips hydrated and soft. |
| Beeswax Pellets | Beeswax acts as a moisturizer and helps to seal in moisture, protecting your lips from dryness. |
| Shea Butter | Shea butter is a natural moisturizer that deeply nourishes the lips, leaving them smooth and supple. |
| Essential Oils | Optional for fragrance, essential oils can be added to your lip balm recipe for a pleasant scent and additional benefits. Choose oils like lavender, peppermint, or citrus for a refreshing and soothing experience. |
These ingredients work together to create a lip balm that not only moisturizes your lips but also provides essential nutrients and protection.
For an easy and effective natural lip balm DIY, gather these ingredients and get ready to make your own lip balm at home.
Note: Make sure to source high-quality, organic ingredients for the best results.

DIY Lip Balm Recipe
Now that you understand the benefits of homemade lip balm and have gathered all the essential ingredients, it’s time to dive into the step-by-step process of creating your very own lip balm. Follow this easy lip balm recipe and enjoy the satisfaction of making a natural lip balm DIY:
Ingredients:
- 2 tablespoons coconut oil
- 1 tablespoon beeswax pellets
- 1 tablespoon shea butter
- 10-15 drops of your favorite essential oil (optional)
Instructions:
- In a microwave-safe glass measuring cup, combine the coconut oil, beeswax pellets, and shea butter.
- Microwave the mixture in 30-second intervals until fully melted. Stir well after each interval.
- If using essential oils, add them to the melted mixture and stir thoroughly.
- Pour the mixture into lip balm tubes or tins, leaving a small space at the top for expansion as it cools.
- Allow the lip balm to cool and solidify for at least one hour.
- Once solidified, cap the lip balm tubes or tins and label them with the date and any additional details.
There you have it! Your very own homemade lip balm using natural ingredients. Now, you can enjoy the hydrating and nourishing benefits of your DIY creation. Feel free to experiment with different essential oil combinations to find your favorite scent. And remember, each batch is customizable, so adjust the ratios of ingredients to achieve your desired consistency.
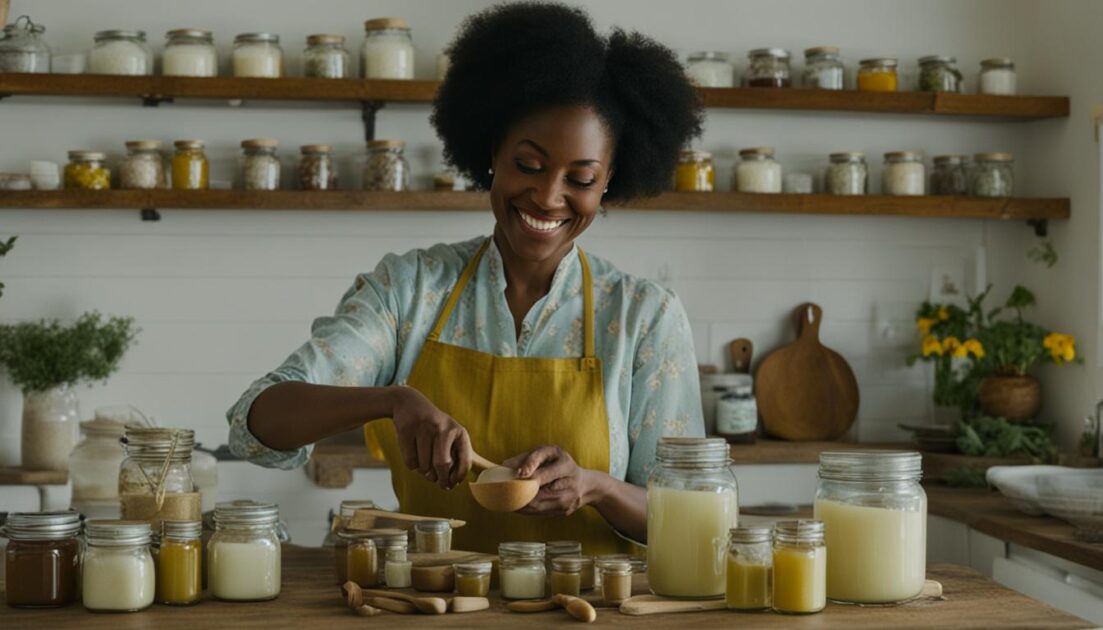
Before we move forward, take a moment to check out this image showcasing the lip balm making process:

Now that you’re equipped with the knowledge and recipe for creating homemade lip balm, it’s time to explore some tips to enhance your lip balm making experience and troubleshoot any potential issues. Let’s dive in!
Tips for Making Homemade Lip Balm
When it comes to making your own lip balm at home, following a few tips can help ensure that you achieve the best results. Here are some lip balm making tips and natural lip balm recipe tips to keep in mind:
- Use a microwave-safe glass measuring cup for easy melting and pouring. This will make the process smoother and prevent any accidents.
- Stir the mixture with a wooden craft stick to avoid getting wax on your kitchen utensils. This will make cleanup much easier.
- Be cautious when handling the hot mixture and use an oven mitt if necessary. Safety should always be the top priority.
- If you prefer a softer consistency, use 1/2 tablespoon of beeswax pellets when using tins instead of tubes. This will create a lip balm that glides on smoothly.
- Allow the mixture to cool slightly before adding essential oils to enhance the scent. This will prevent the fragrance from evaporating too quickly.
- Fill lip balm containers to the top to minimize divots as the mixture hardens. This will give your lip balm a smooth and professional appearance.
- Test the lip balm on a small patch of skin before full use to check for any reactions. It’s always better to be safe than sorry.
- Store the lip balm in a cool place to prevent melting in warm weather. This will help maintain its texture and prolong its shelf life.
By keeping these lip balm making tips in mind, you’ll be able to create your own natural lip balm with confidence and enjoy the benefits of nourished and hydrated lips.
| Tip | Description |
|---|---|
| Use a microwave-safe glass measuring cup | For easy melting and pouring |
| Stir with a wooden craft stick | To avoid getting wax on kitchen utensils |
| Be cautious when handling the hot mixture | Use an oven mitt if necessary |
| Use 1/2 tablespoon of beeswax pellets for softer consistency | When using tins instead of tubes |
| Cool the mixture slightly before adding essential oils | To enhance the scent |
| Fill lip balm containers to the top | To minimize divots |
| Test the lip balm on a small patch of skin | To check for any reactions |
| Store the lip balm in a cool place | To prevent melting in warm weather |

Variations and Substitutions for Homemade Lip Balm
While the above recipe uses coconut oil, beeswax, and shea butter, you can experiment with different variations and substitutions to create your own unique homemade lip balm.
For example, you can try using different carrier oils like olive oil, avocado oil, or jojoba oil instead of sweet almond oil. Each oil offers its own benefits and properties that can enhance the moisturizing and nourishing effects of your lip balm.
Another way to customize your homemade lip balm is by adding different essential oils for fragrance and additional benefits. Lavender essential oil can provide a soothing aroma, while peppermint essential oil can create a refreshing and cooling sensation. However, it’s important to note that some essential oils, like citrus oils, can increase UV sensitivity. Additionally, “hot oils” like cinnamon bark and clove can potentially cause skin irritation, so use them sparingly or avoid them altogether.
Remember to always conduct a patch test before applying any new ingredients to your lips to ensure there are no adverse reactions.
By exploring different ingredients and experimenting with various combinations, you can create lip balms that are tailored to your preferences and needs. Get creative and have fun with your homemade lip balm variations!
| Ingredient | Variation/Substitution |
|---|---|
| Carrier Oil | Olive oil, avocado oil, jojoba oil |
| Essential Oil | Lavender oil, peppermint oil (avoid citrus oils and “hot oils”) |

Troubleshooting Tips for Homemade Lip Balm
If you experience any issues with your homemade lip balm, don’t worry! There are simple troubleshooting tips that can help you fix common problems and ensure your lip balm turns out perfect.
Grainy Texture
If your lip balm becomes gritty and has a grainy texture, it’s likely due to the shea butter crystallizing. To avoid this issue, follow these steps:
- Heat the shea butter to 175°F in a double boiler for 20 minutes before adding it to the recipe. This will help prevent crystallization and create a smoother texture.
- Once you’ve made the lip balm, place it in the refrigerator for quick cooling. This can also help prevent shea butter from crystallizing and creating a grainy texture.
Consistency Issues
If your lip balm has consistency issues, whether it’s too soft or too hard, you can easily adjust it by manipulating the ingredients. Here’s what you can do:
- If your lip balm is too soft, melt it down and add a little more beeswax. Beeswax helps solidify the lip balm and gives it a firmer texture. Start by adding a small amount, such as a pinch, and gradually mix it in until you achieve the desired consistency.
- On the other hand, if your lip balm is too hard and difficult to use, melt it down and add more coconut oil. Coconut oil has a softening effect and will make the lip balm smoother and easier to apply. Again, start with a small amount and adjust as needed.
Remember, finding the right balance of ingredients is crucial for achieving the desired consistency in your homemade lip balm. Don’t be afraid to experiment and adjust the recipe according to your preferences.
With these troubleshooting tips, you’ll be able to overcome common issues and create homemade lip balm that is smooth, nourishing, and perfect for your lips.
| Issue | Troubleshooting Tip |
|---|---|
| Grainy Texture | Heat shea butter before adding it to the recipe and place the lip balm in the refrigerator for quick cooling. |
| Consistency Issues | Add more beeswax for a firmer texture or more coconut oil for a softer texture. |
Shelf Life and Expiration of Homemade Lip Balm
One important factor to consider when making homemade lip balm is its shelf life. Similar to other skincare products, homemade lip balm also has a limited lifespan. It is crucial to understand the shelf life and expiration of your homemade lip balm to ensure its effectiveness and safety.
It is generally recommended to use your homemade lip balm within a year of preparation. Using it within this timeframe will ensure that you receive the maximum benefits and the best quality from the product. Over time, the texture and scent of the lip balm may naturally change, which is normal for any skincare product.
If you observe any unusual changes in the texture, color, or scent of your homemade lip balm, it’s essential to exercise caution. If the lip balm starts to smell off or develops an unpleasant odor, it’s best to discard it and make a fresh batch. This ensures that you are using a safe and effective product on your lips.
By adhering to the recommended usage timeframe and regularly monitoring the quality of your homemade lip balm, you can enjoy its benefits while ensuring your lip care routine remains effective and enjoyable.

| Indications of expired homemade lip balm |
|---|
| Lip balm smells rancid |
| Lip balm changes in color or appearance |
| Texture becomes grainy or lumpy |
| Lip balm loses its efficacy or no longer provides desired results |
Quotes:
The effectiveness and safety of homemade lip balm can be compromised if used beyond its expiration date. It’s crucial to monitor the quality of the product and discard if any unusual changes occur.
“Using homemade lip balm within the recommended timeframe ensures that you are getting the maximum benefits and maintaining the quality of the product.”
Safe Essential Oils for Lip Balm
When it comes to adding a delightful scent to your homemade lip balm, essential oils are a popular choice. However, not all essential oils are suitable for use on the delicate skin of your lips. It’s important to select safe options that won’t cause skin irritation or sensitization.
The following essential oils are considered safe for use in lip balms:
- Peppermint: Peppermint essential oil not only provides a refreshing scent but also has a cooling effect on the lips, giving a soothing sensation.
- Lavender: Known for its calming properties, lavender essential oil can help create a relaxing lip balm experience.
- Vanilla: The sweet and comforting scent of vanilla essential oil adds a pleasant aroma to your lip balm, making it a popular choice.
- Citrus (non-photosensitive varieties): Citrus essential oils like sweet orange, lemon, or grapefruit can add a zesty and uplifting fragrance to your lip balm. However, it’s essential to use non-photosensitive varieties to avoid any adverse reactions to sunlight.
While these essential oils are generally well-tolerated, it’s always a good practice to perform a patch test before applying the lip balm to your lips to ensure no adverse reactions occur.
Caution: Avoid “Hot Oils” and Milder Scents
While many essential oils offer delightful scents, some are best avoided in lip balms due to their potential to cause skin irritation or sensitivity. It’s advised to steer clear of “hot oils” such as cinnamon bark and clove, as they can be too intense for the delicate skin of the lips and may cause discomfort.
Additionally, some essential oils may have milder scents that may not come through strongly in lip balm formulations. It’s best to choose oils with robust and noticeable fragrances to enhance the overall experience of your lip balm.
Now that you know which essential oils are safe to use in your lip balm, you can create a beautifully scented product that will not only keep your lips moisturized but also delight your senses.

Essential Oils for Lip Balm Scents
| Essential Oil | Benefits |
|---|---|
| Peppermint | Refreshing scent, cooling effect on the lips |
| Lavender | Calming properties, relaxing lip balm experience |
| Vanilla | Sweet aroma, comforting fragrance |
| Citrus (non-photosensitive varieties) | Zesty and uplifting fragrance, avoid photosensitivity |
Storage and Usage Tips for Homemade Lip Balm
When it comes to homemade lip balm, proper storage is essential to maintain its quality. Follow these tips to keep your homemade lip balm fresh and effective:
- Store your homemade lip balm in a cool place, away from direct sunlight. Heat can cause the lip balm to melt and lose its consistency.
- Consider using a small container or tin to store your lip balm. This will help protect it from exposure to air and contaminants.
- Avoid leaving your lip balm in hot or humid environments, such as a car or a bathroom. Excessive heat and moisture can affect the texture and longevity of the lip balm.
- If you plan to carry your homemade lip balm with you, consider using a lip balm tube or a small travel-sized container. This will make application on the go more convenient.
- Always check the expiration date of your lip balm. While homemade lip balm typically lasts for a year, it’s important to discard it if you notice any changes in texture, smell, or color.
Using homemade lip balm is simple and easy. Just follow these steps:
- Ensure that your lips are clean and dry before applying the lip balm.
- Take a small amount of the lip balm onto your finger or a lip balm applicator.
- Gently apply the lip balm to your lips, starting from the center and moving towards the corners.
- Massage the lip balm into your lips using circular motions to ensure even coverage.
- Reapply the lip balm throughout the day as needed, especially during dry or cold weather.
Remember, it’s always a good idea to perform a patch test before using any new lip balm or lip care product. Apply a small amount to your wrist or the inside of your elbow and wait for 24 hours to check for any adverse reactions. If you experience any redness, itching, or irritation, discontinue use immediately.

Customization and Gift Ideas for Homemade Lip Balm
One of the great advantages of making your own lip balm is the ability to customize it to your preferences. With a few simple tweaks, you can create a lip balm that is uniquely yours. Let’s explore some ways to customize your homemade lip balm:
Experiment with Different Essential Oils
Essential oils not only add fragrance to your lip balm but also offer various benefits for your lips. Consider trying different essential oils like lavender for a calming effect, peppermint for a refreshing sensation, or orange for a burst of citrusy goodness. You can even mix different oils to create your signature scent.
Adjust the Ratios of Ingredients
If you prefer a softer or harder lip balm, you can adjust the ratios of the ingredients accordingly. For a softer balm, increase the amount of coconut oil or decrease the amount of beeswax. On the other hand, if you prefer a firmer balm, add more beeswax or reduce the amount of oil. Play around with the ratios until you achieve the desired consistency.
Add Natural Colorants
Want to add a hint of color to your lip balm? Consider using natural colorants like beetroot powder, turmeric, or cocoa powder. These ingredients not only add color but also bring their own unique benefits to your lip balm.
Create Personalized Gift Sets
Homemade lip balm makes a thoughtful and personal gift for friends and loved ones. You can package your lip balms in cute containers and add personalized labels. To make it even more special, consider creating gift sets with other homemade skincare products like body butter or sugar scrubs. It’s a wonderful way to pamper your loved ones while sharing the joy of natural skincare.
Get creative and have fun customizing your homemade lip balm. Let your imagination run wild and enjoy the process of creating a lip balm that is truly one-of-a-kind.
| Advantages of Customizing Homemade Lip Balm | Why it Matters |
|---|---|
| You can create a lip balm that perfectly suits your preferences and needs. | Personalization allows you to address specific lip care concerns and enjoy a lip balm that feels and smells just right. |
| Experimenting with essential oils and ingredients allows you to enjoy the benefits of natural skincare. | Using natural ingredients and essential oils provides nourishment, hydration, and protection to your lips without harmful chemicals. |
| Homemade lip balm makes a wonderful gift that shows care and thoughtfulness. | Creating personalized lip balms and gift sets allows you to share the joy of natural skincare and pamper your loved ones. |
Conclusion
Making your own homemade lip balm is a rewarding and fun DIY project that allows you to take control of what you put on your lips. By using natural ingredients like coconut oil, beeswax, and shea butter, you can create a nourishing lip balm that will keep your lips soft, healthy, and protected.
One of the key benefits of homemade lip balm is the ability to customize it according to your preferences. You can experiment with different variations, scents, and packaging to make it truly your own. Whether you prefer a subtle hint of lavender or a refreshing burst of peppermint, the choice is yours.
Using natural lip balm offers several advantages over commercial options. It allows you to avoid harmful chemicals and additives often found in store-bought lip balms, ensuring a safer and more natural lip care routine. Additionally, making your own lip balm can be a cost-effective alternative, saving you money in the long run.
Enjoy the benefits of using a homemade lip balm and share the joy by giving handmade lip balms as gifts. Whether it’s a thoughtful token of appreciation or a personalized present for a special occasion, homemade lip balms make meaningful gifts that show you care.
FAQ
How do I make lip balm at home with natural ingredients?
Making lip balm at home with natural ingredients is easy. You can use ingredients like coconut oil, beeswax, shea butter, and essential oils to create a nourishing lip balm. Follow our step-by-step tutorial for a DIY lip balm recipe.
What are the benefits of homemade lip balm?
Homemade lip balm allows you to avoid harmful chemicals found in store-bought options. You can customize the ingredients to suit your preferences and address specific lip care needs. Natural ingredients like coconut oil, beeswax, and shea butter provide nourishment and hydration for soft and healthy lips.
Which essential ingredients do I need for homemade lip balm?
The essential ingredients for homemade lip balm include coconut oil, beeswax pellets, shea butter, and optional essential oils for fragrance. Coconut oil provides moisturizing properties, beeswax helps lock in moisture, shea butter deeply nourishes, and essential oils add a pleasant scent and additional benefits.
Can you provide a DIY lip balm recipe using natural ingredients?
Certainly! Here is a simple DIY lip balm recipe: Combine 2 tablespoons of coconut oil, 1 tablespoon of beeswax pellets, and 1 tablespoon of shea butter in a microwave-safe glass measuring cup. Microwave on high for 30-second intervals, stirring in between, until fully melted. Add 10-15 drops of your preferred essential oil (optional) and mix well. Pour the mixture into lip balm containers and let it cool until solid.
What tips should I keep in mind when making homemade lip balm?
When making homemade lip balm, use a microwave-safe glass measuring cup, stir with a wooden craft stick, be cautious when handling the hot mixture, adjust the ingredients for desired consistency, cool slightly before adding essential oils, fill containers to the top, test on a small patch of skin, and store in a cool place to prevent melting.
Can I substitute or vary the ingredients in homemade lip balm?
Yes, you can experiment with variations and substitutions. Try using different carrier oils like olive oil or avocado oil in place of sweet almond oil. You can also add different essential oils for fragrance and benefits.
What should I do if I encounter issues with my homemade lip balm?
If your lip balm becomes grainy, heat the shea butter before adding it to the recipe and cool the mixture quickly in the refrigerator. For consistency issues, adjust the amount of beeswax for softness or coconut oil for hardness.
How long does homemade lip balm last?
Homemade lip balm has a shelf life of about one year. However, if the texture or scent changes, it’s best to discard and make a fresh batch.
Which essential oils should I choose for my homemade lip balm?
Safe options for lip balm include peppermint, lavender, vanilla, and non-photosensitive citrus oils. Avoid “hot oils” like cinnamon bark and clove, as well as mildly scented oils that may not come through strongly.
How should I store and use homemade lip balm?
Store homemade lip balm in a cool place away from direct sunlight to prevent melting. Apply it to your lips as needed for hydration and nourishment. Remember to do a patch test before full use to check for any adverse reactions.
Can I customize and gift homemade lip balm?
Yes, one advantage of making your own lip balm is the ability to customize it. You can experiment with different essential oils, adjust ingredient ratios, and even add natural colorants. Homemade lip balm makes a thoughtful gift. Package it in cute containers, add personalized labels, or create gift sets with other homemade skincare products.